Project Introduction: Operation Hate Mail
What happens when you take a numbers matching S-code 1967 Mustang that has been a race car since 1969 and tell Cortex to make it competitive against the fastest production cars available today? The result is a suspension & chassis concept utilizing the latest in professional race car technology, some seriously advanced engineering, and a very controversial engine choice! Combine that with the most advanced electronics and software available and what do you get? A car that looks like the 70's and and will hang with any modern supercar. Oh and hate mail... you also get some hate mail.
If you're a fan of some serious engineering & radical race car builds, read on. If you're a Mustang purist, we'd still encourage you to keep reading but just know you might get upset.
Part 1: The vision
This particular chassis rolled off the assembly line back in 1967 as an S-Code fastback with, what was at the time, the first big block engine fitted into a Mustang. While not quite as desirable and well known as their 428 Cobra Jet brethren, the 390ci S-Code cars made almost as much horsepower and torque and are by and large the performance bargain of the era. With about twice the total production numbers as the 428CJ, the S-Code cars have steadily increased in value over the years yet still remain vastly more attainable than the K-code 289 and 428 CJ cars. The owner of this particular car bought it from the original owner back in 1968 and immediately took it to the race track. This car has raced in some capacity since 1968 all by the owner.
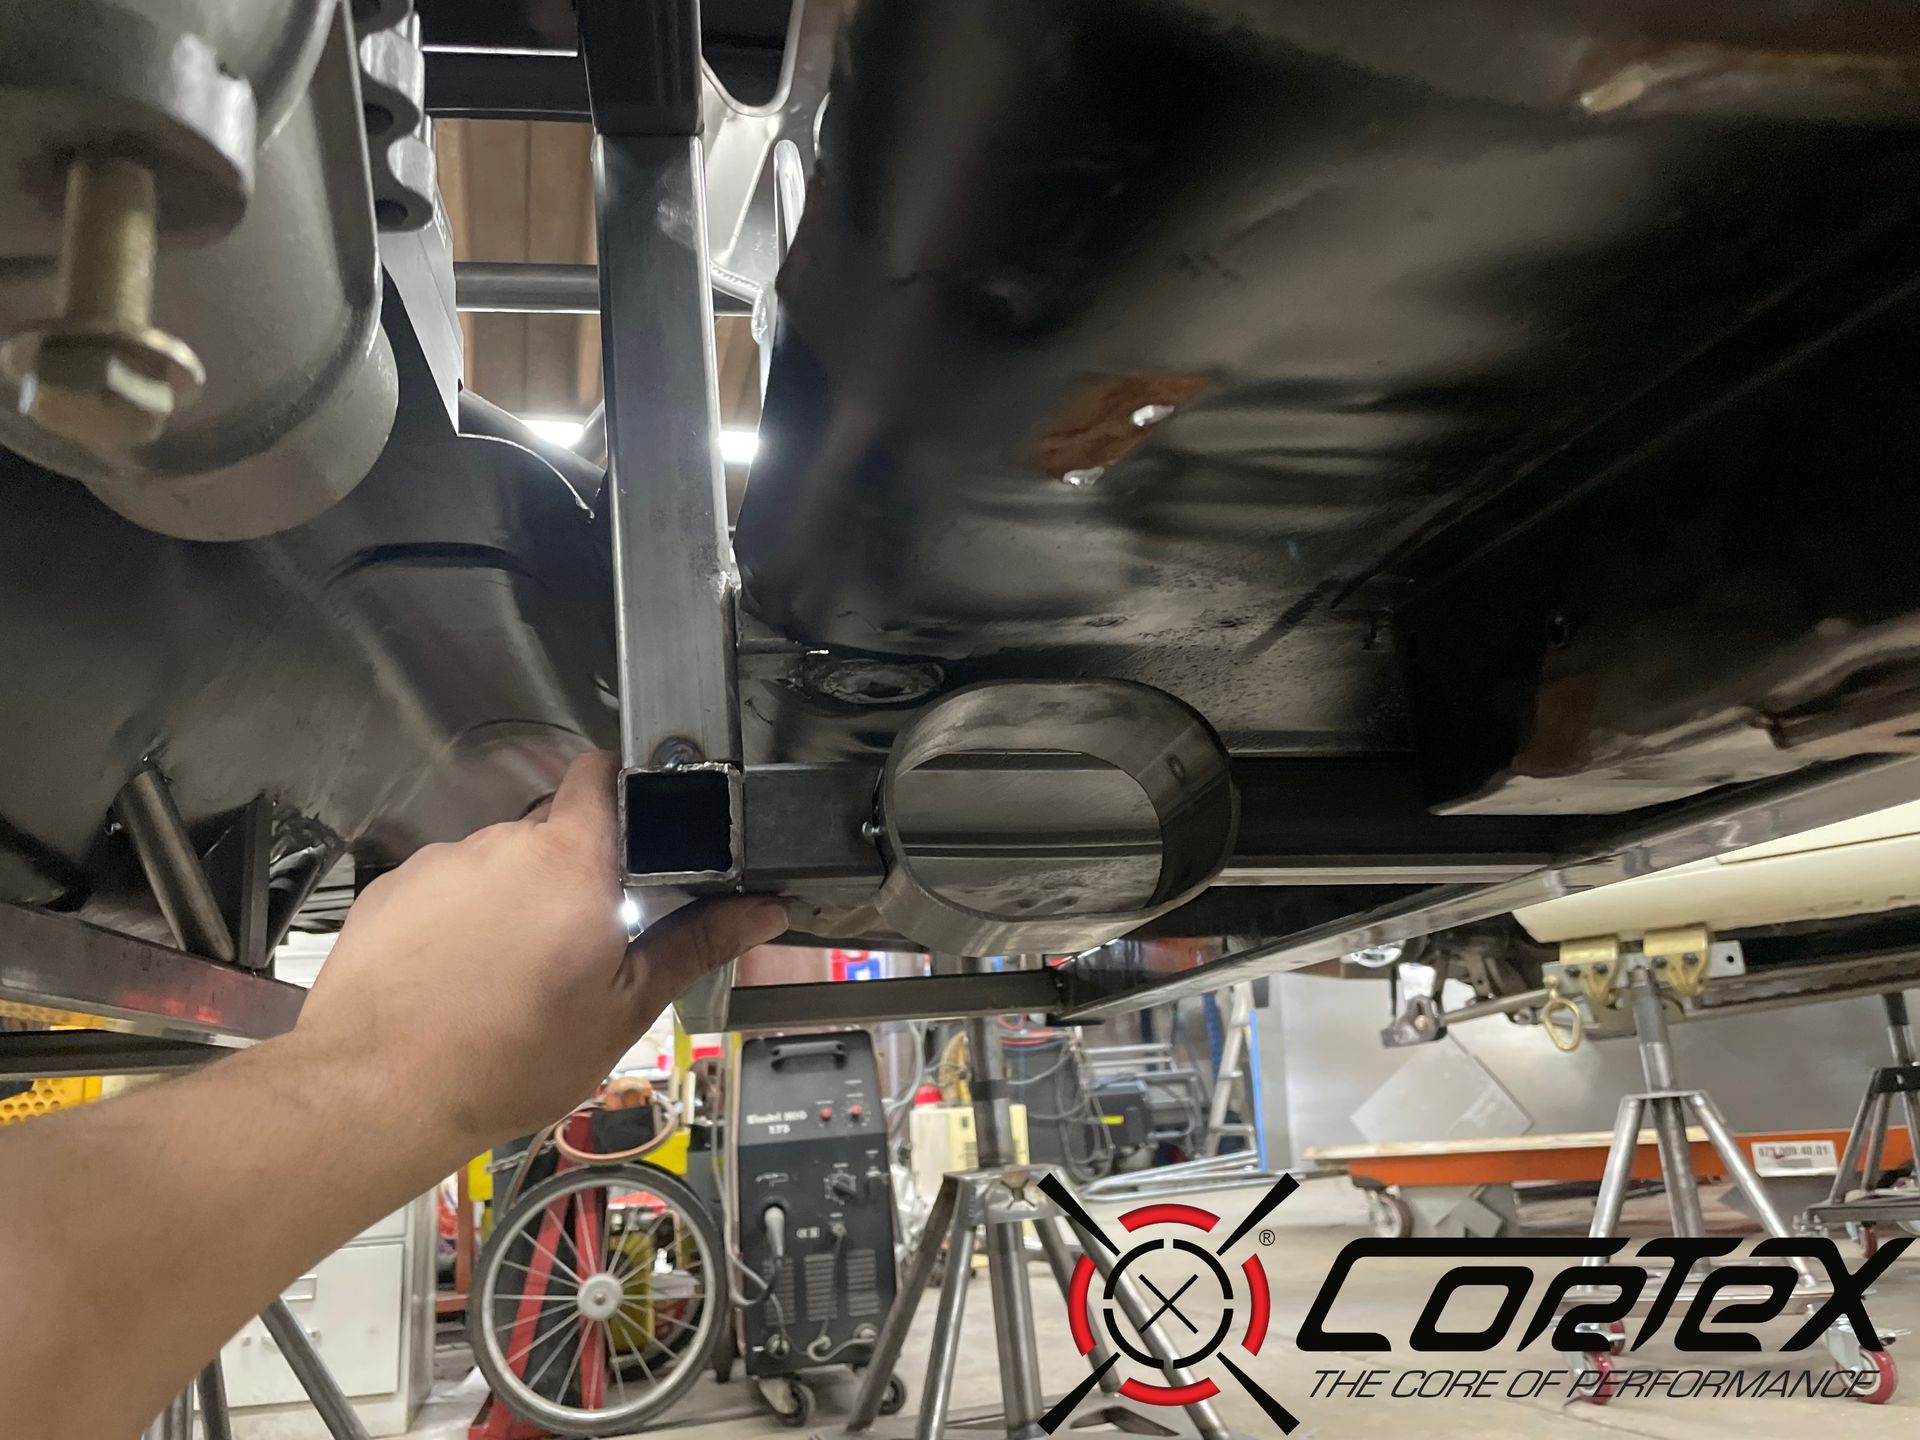
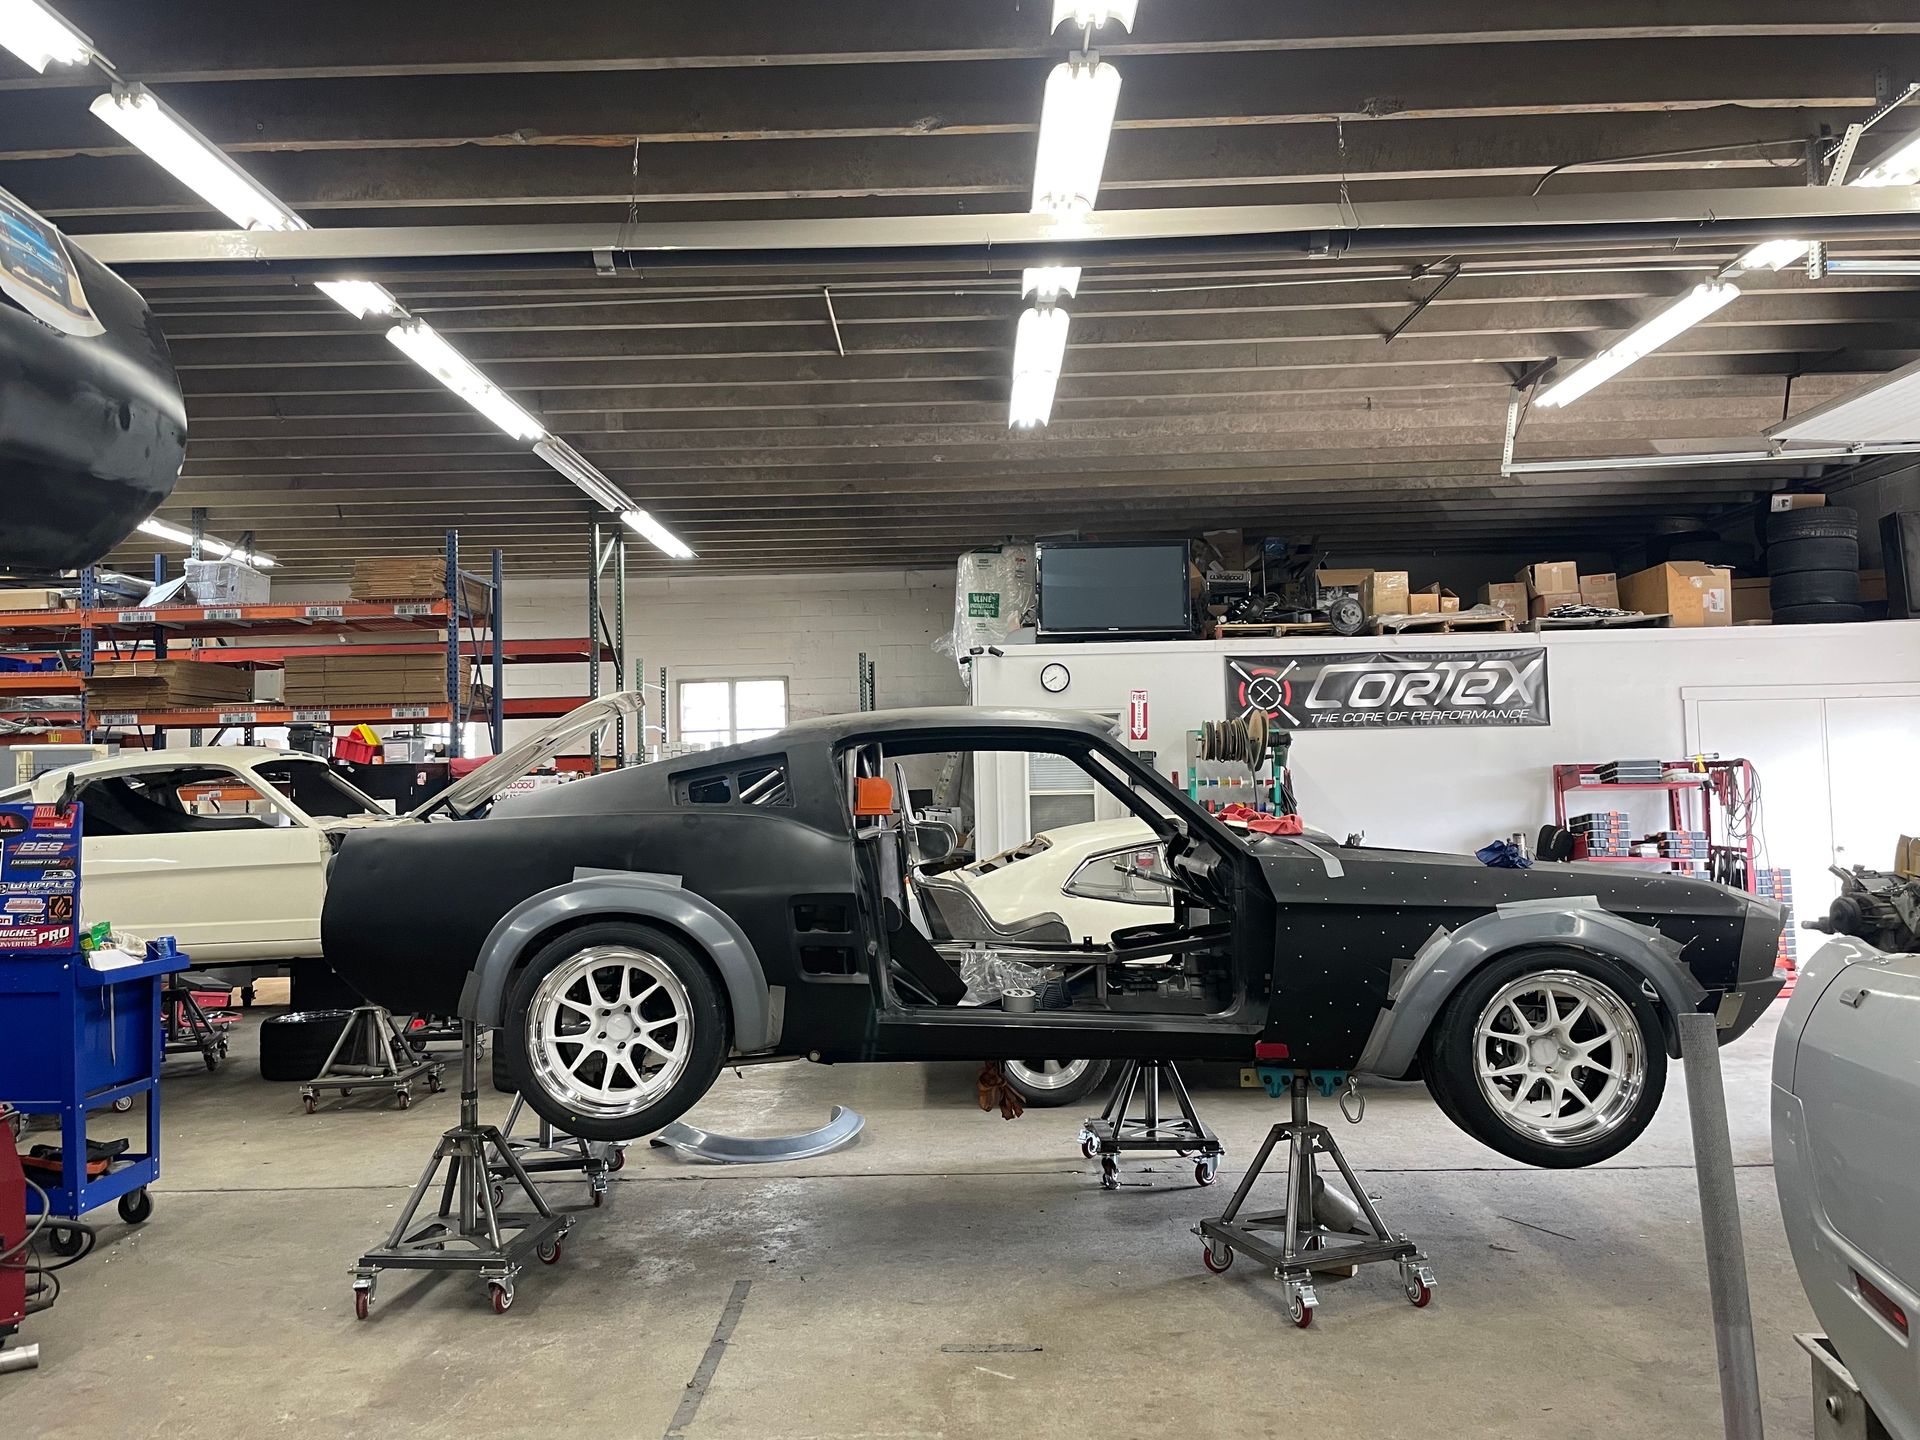
Hate Mail's formula & racing purpose have changed several times over the years and now it comes to us as a bare chassis. The goal? A max effort vintage resto-mod designed primarily to compete in a variety of national level autocrosses & road course events. The customer came to us with an extensive engineering background and a specific goal; to create a structural "spine" to increase torsional stiffness in the notoriously flexible vintage chassis. Trans Am race car meets the street; sounds like a match made in heaven to us.
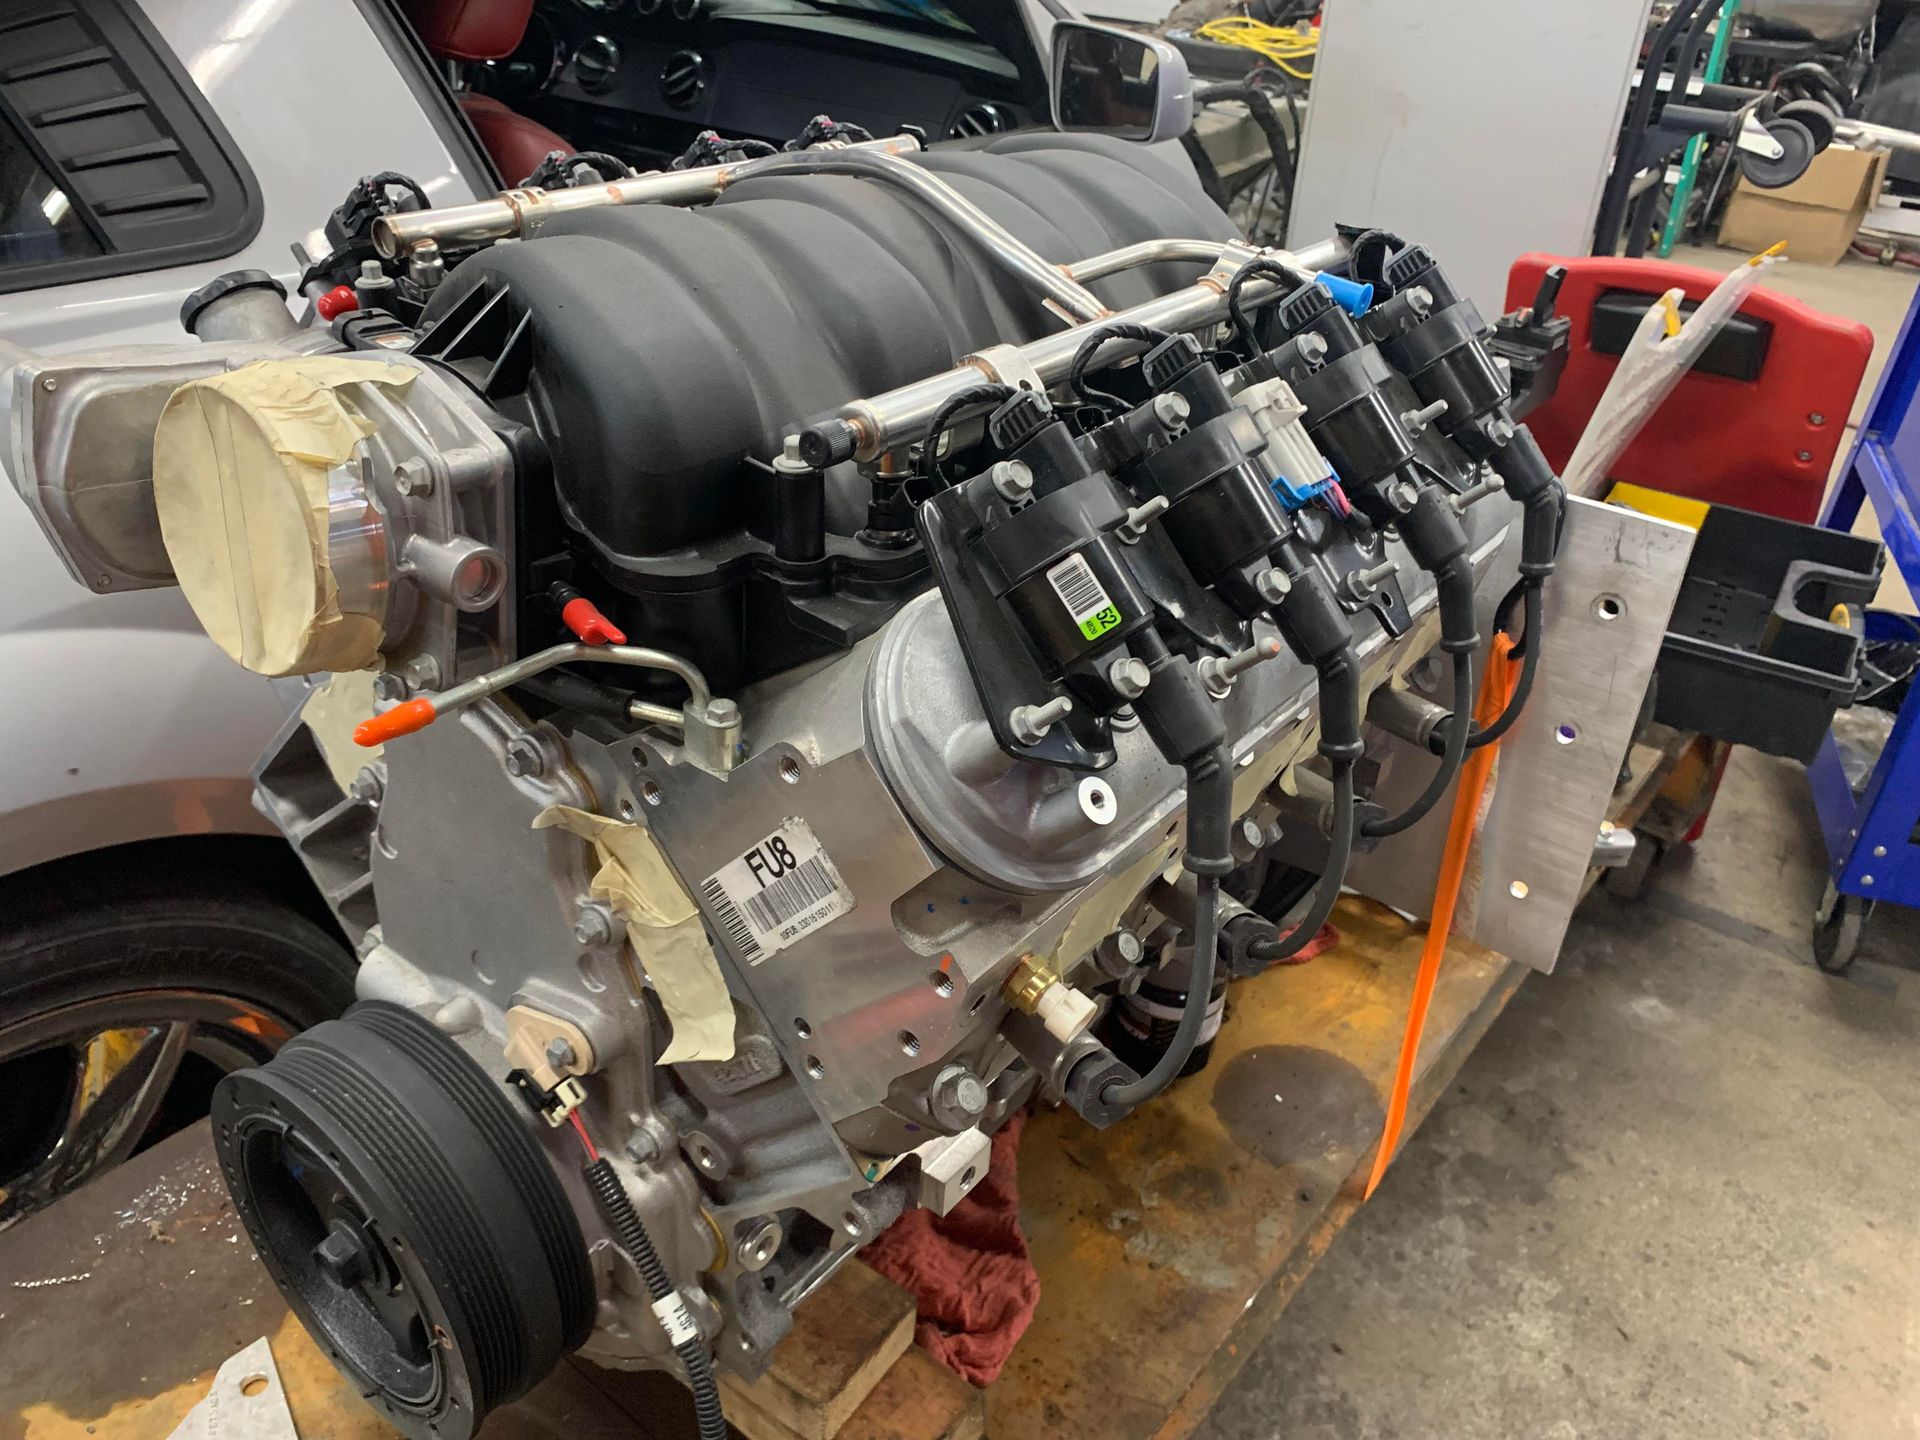
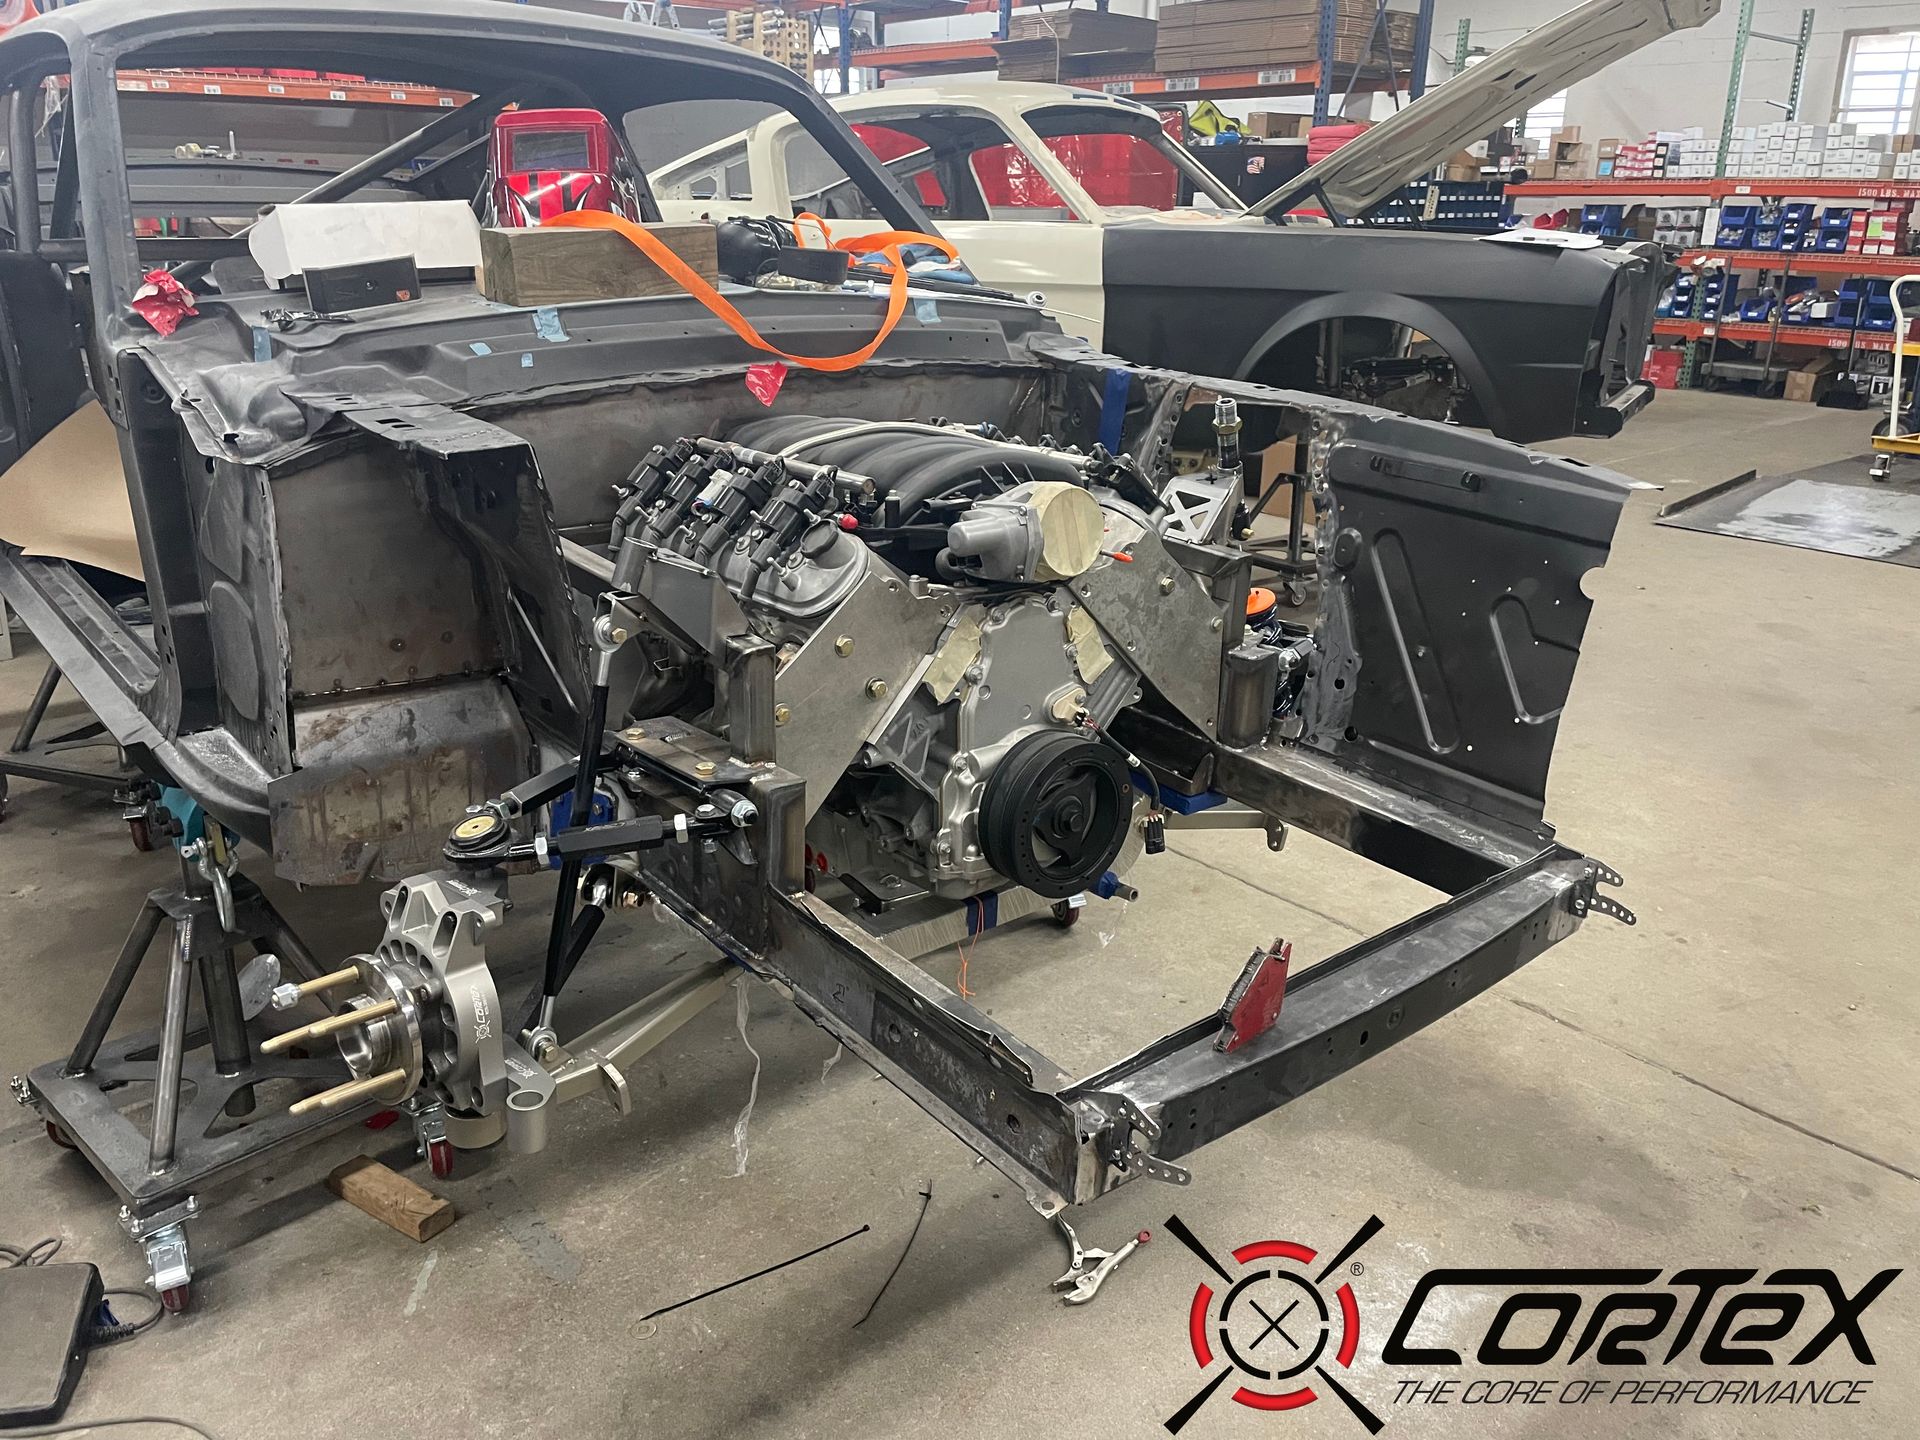
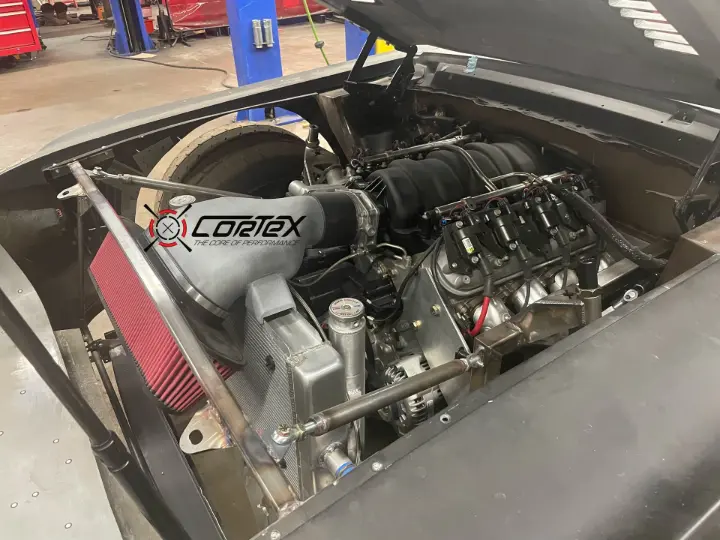
Dropped at our shop over the winter, the time has come to start construction of the chassis components. The customer elected to provide a new Chevy LS7 7.0L crate motor as the heart of the project. Yes, yes we get it. There are engine choices from the Blue Oval that are "just as good." But, the turn key convenience and compact packaging of the LS7 were ultimately the criteria that sealed the deal.
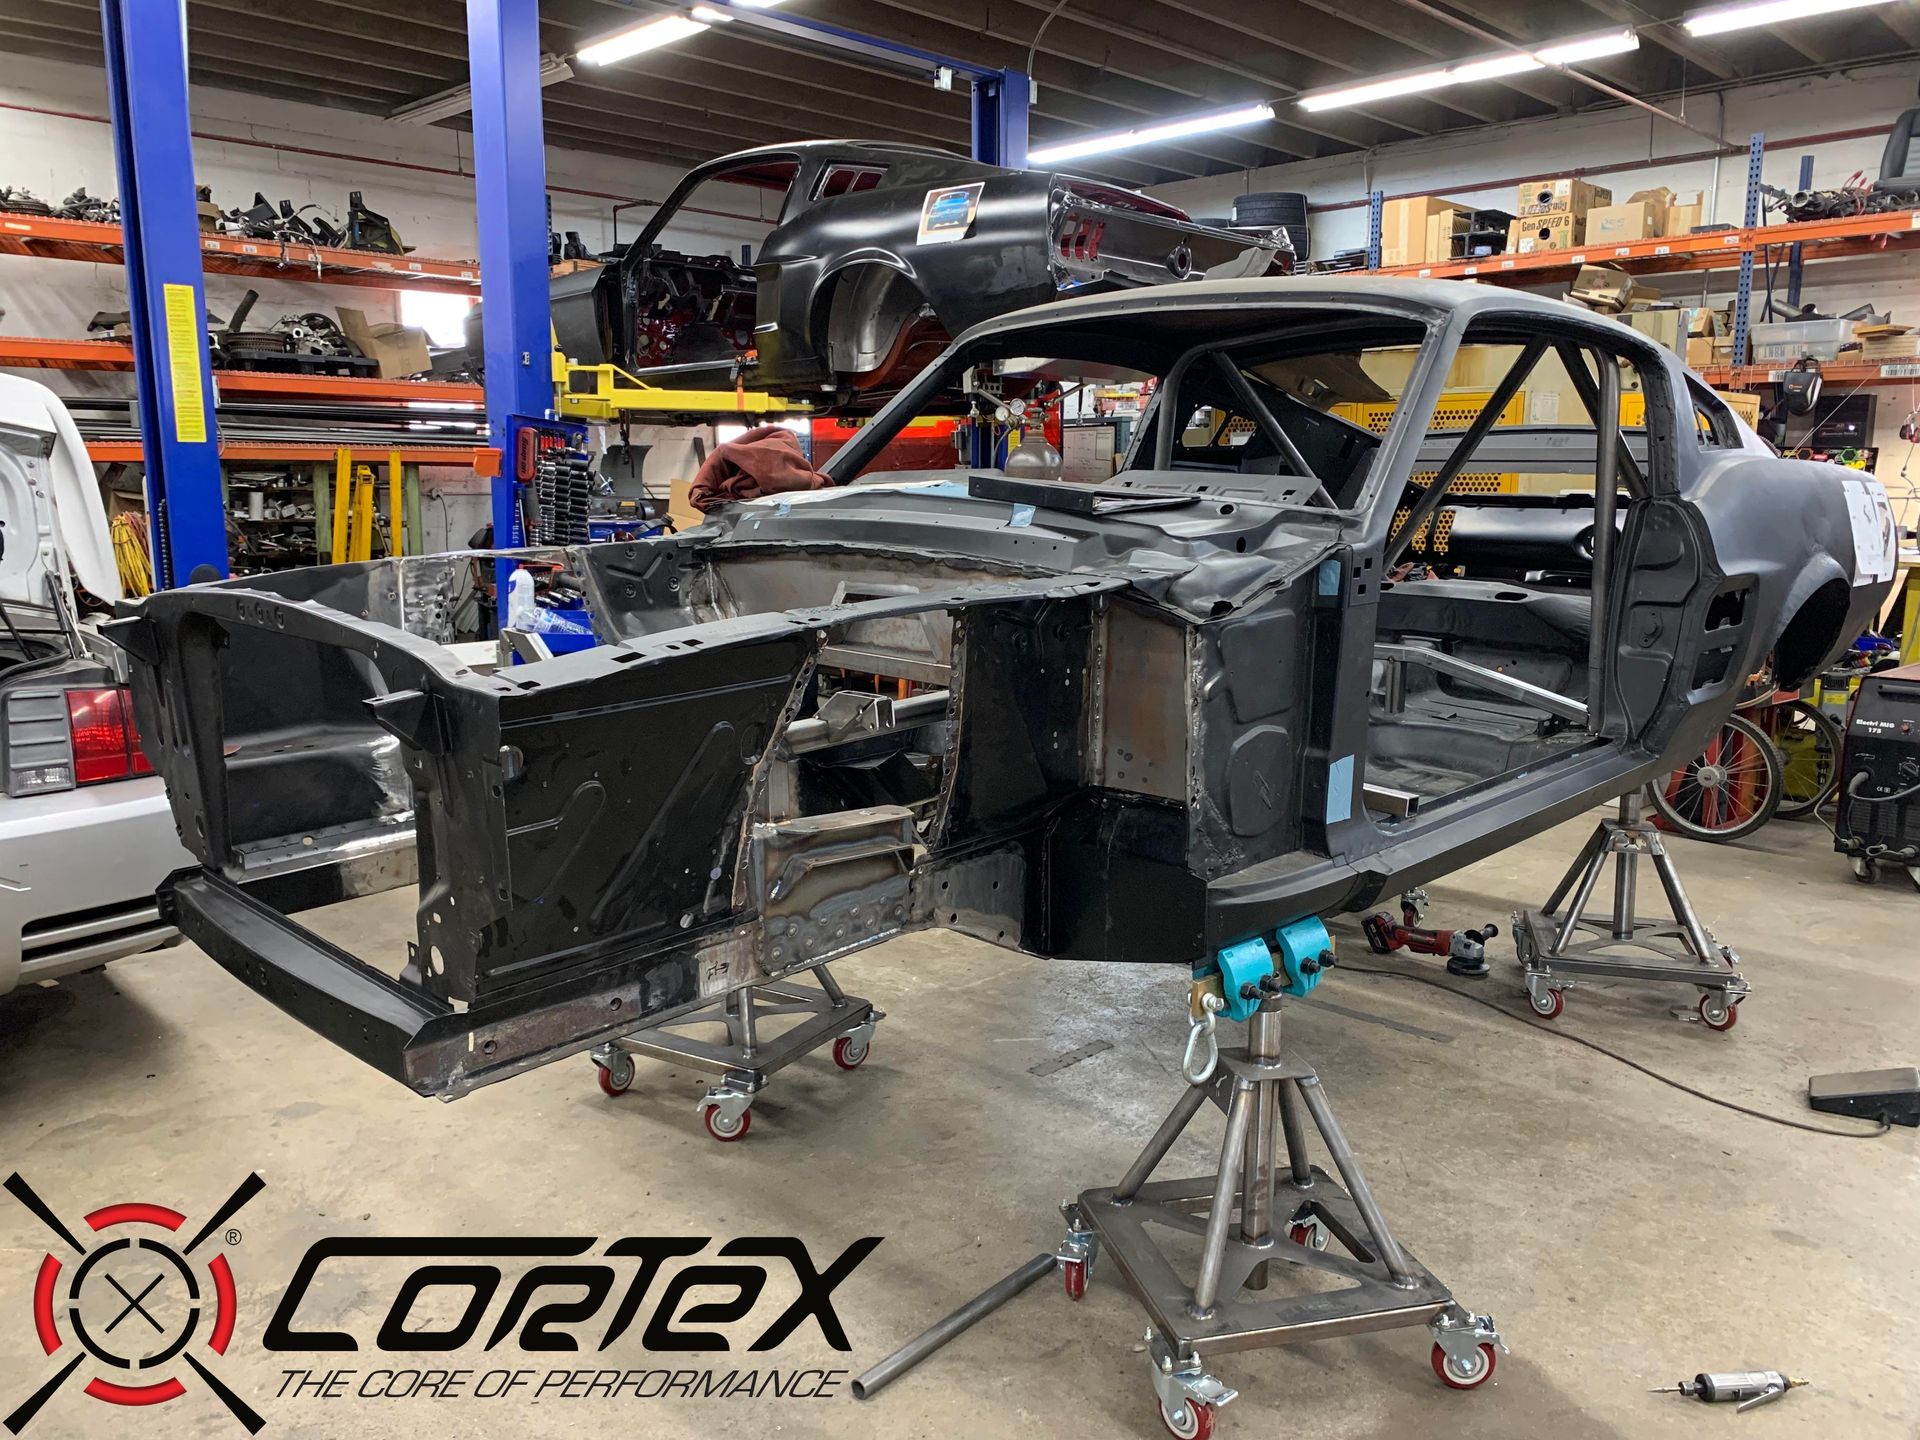
We first began by taking some key measurements and pulling everything into CAD. Like all proper race cars, the goal was to have all load bearing forces directed through the tubing & structural elements while retaining the overall look and shape of the car. This meant designing a structure strong enough to take the massive cornering forces in a way that still fit within the factory sheet metal AND packaged in a way to retain a somewhat stock interior appearance.
With Rick having completed the CAD, the guys in the shop set to work to create the structure. First the firewall and large portion of the trans tunnel were gutted.
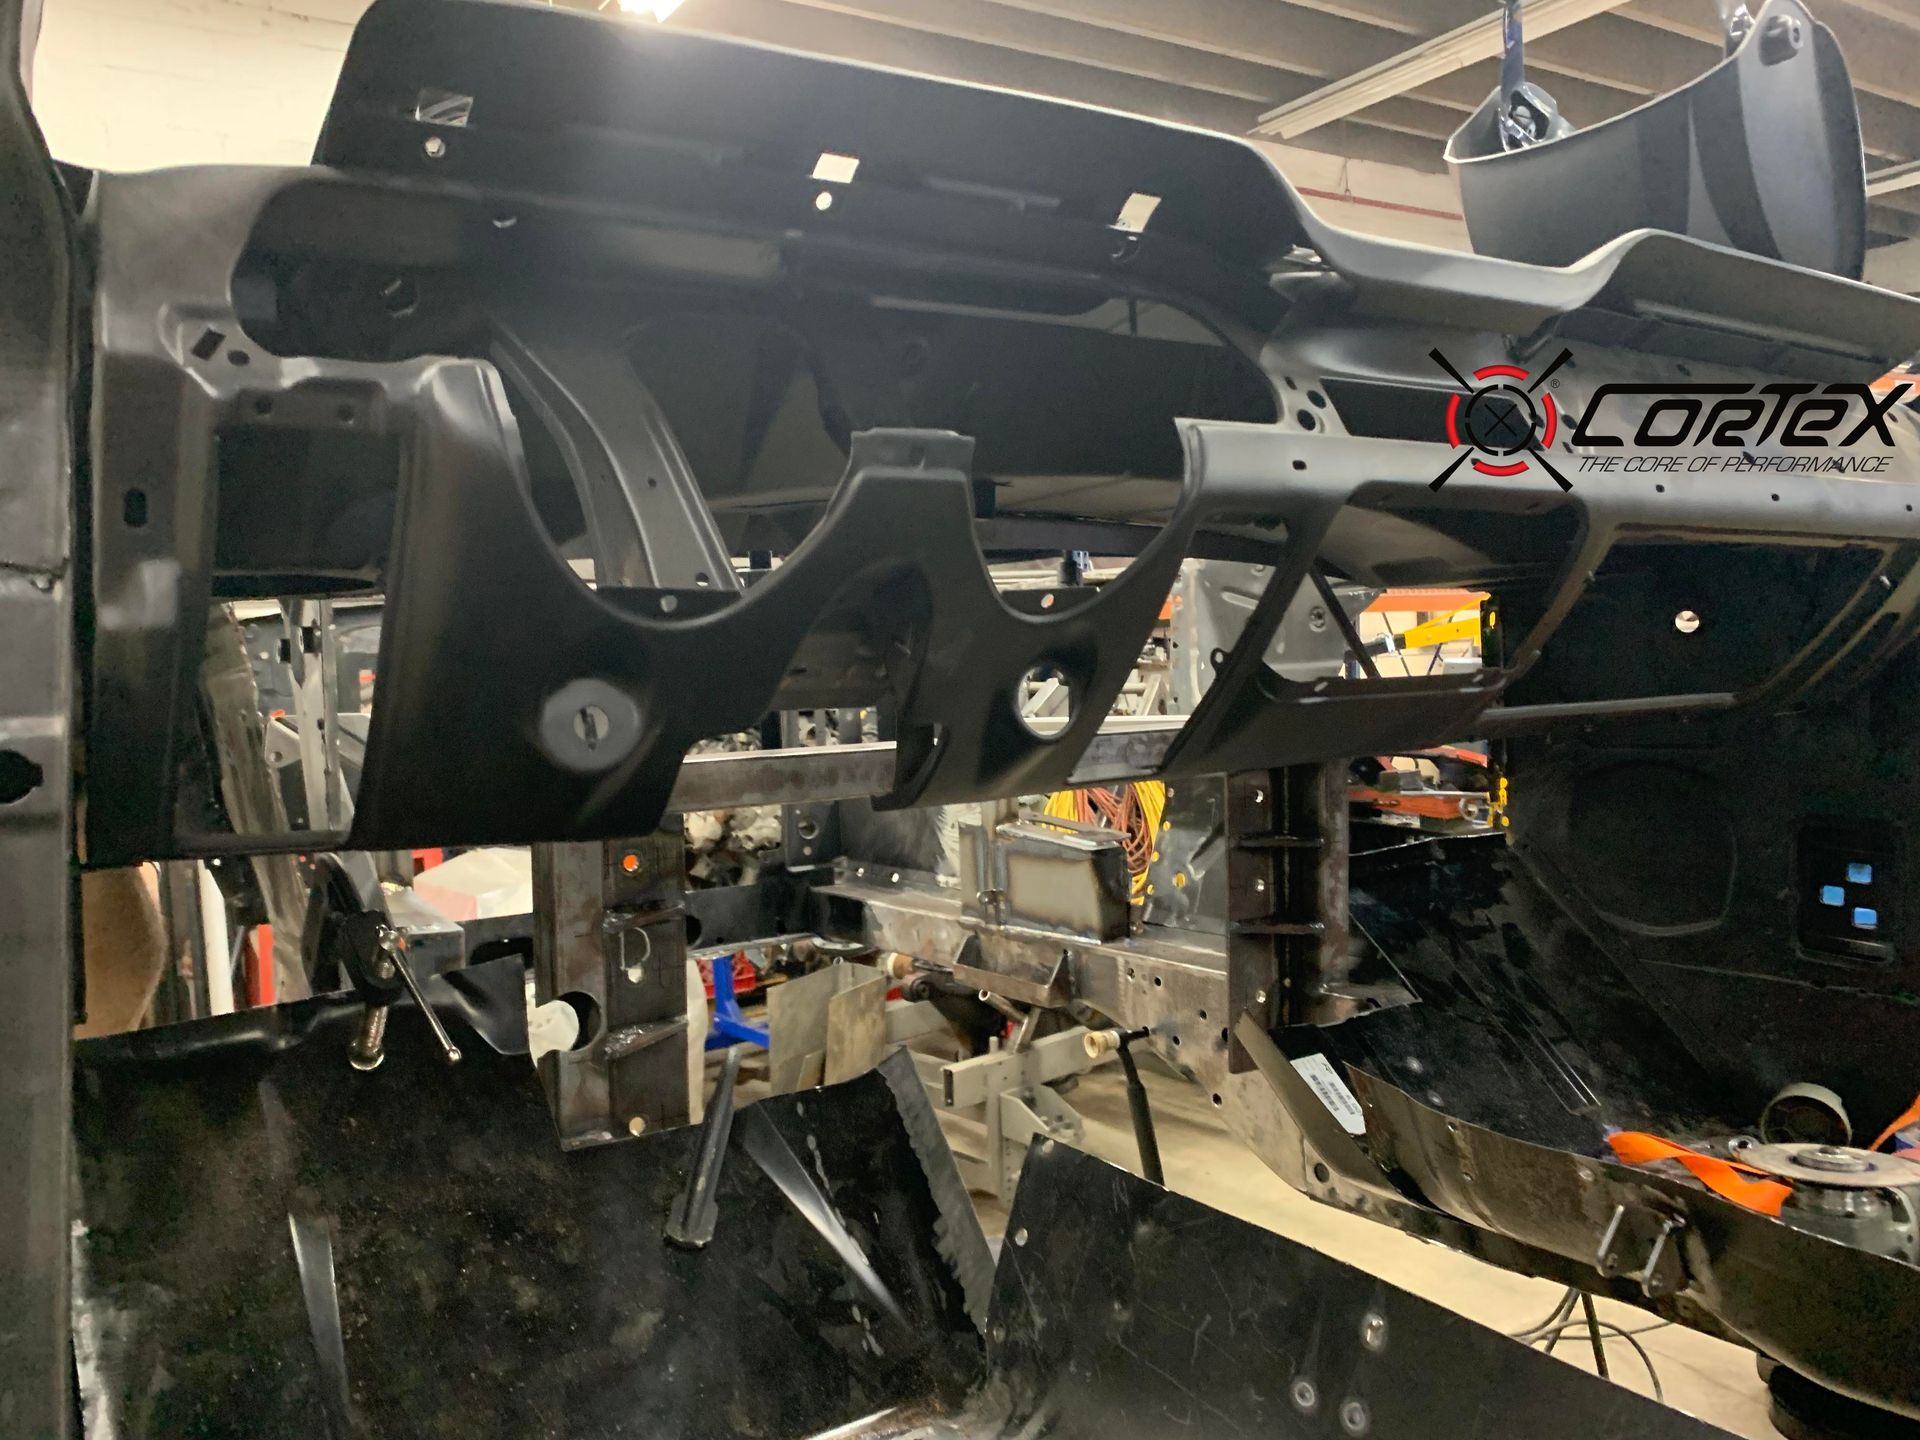
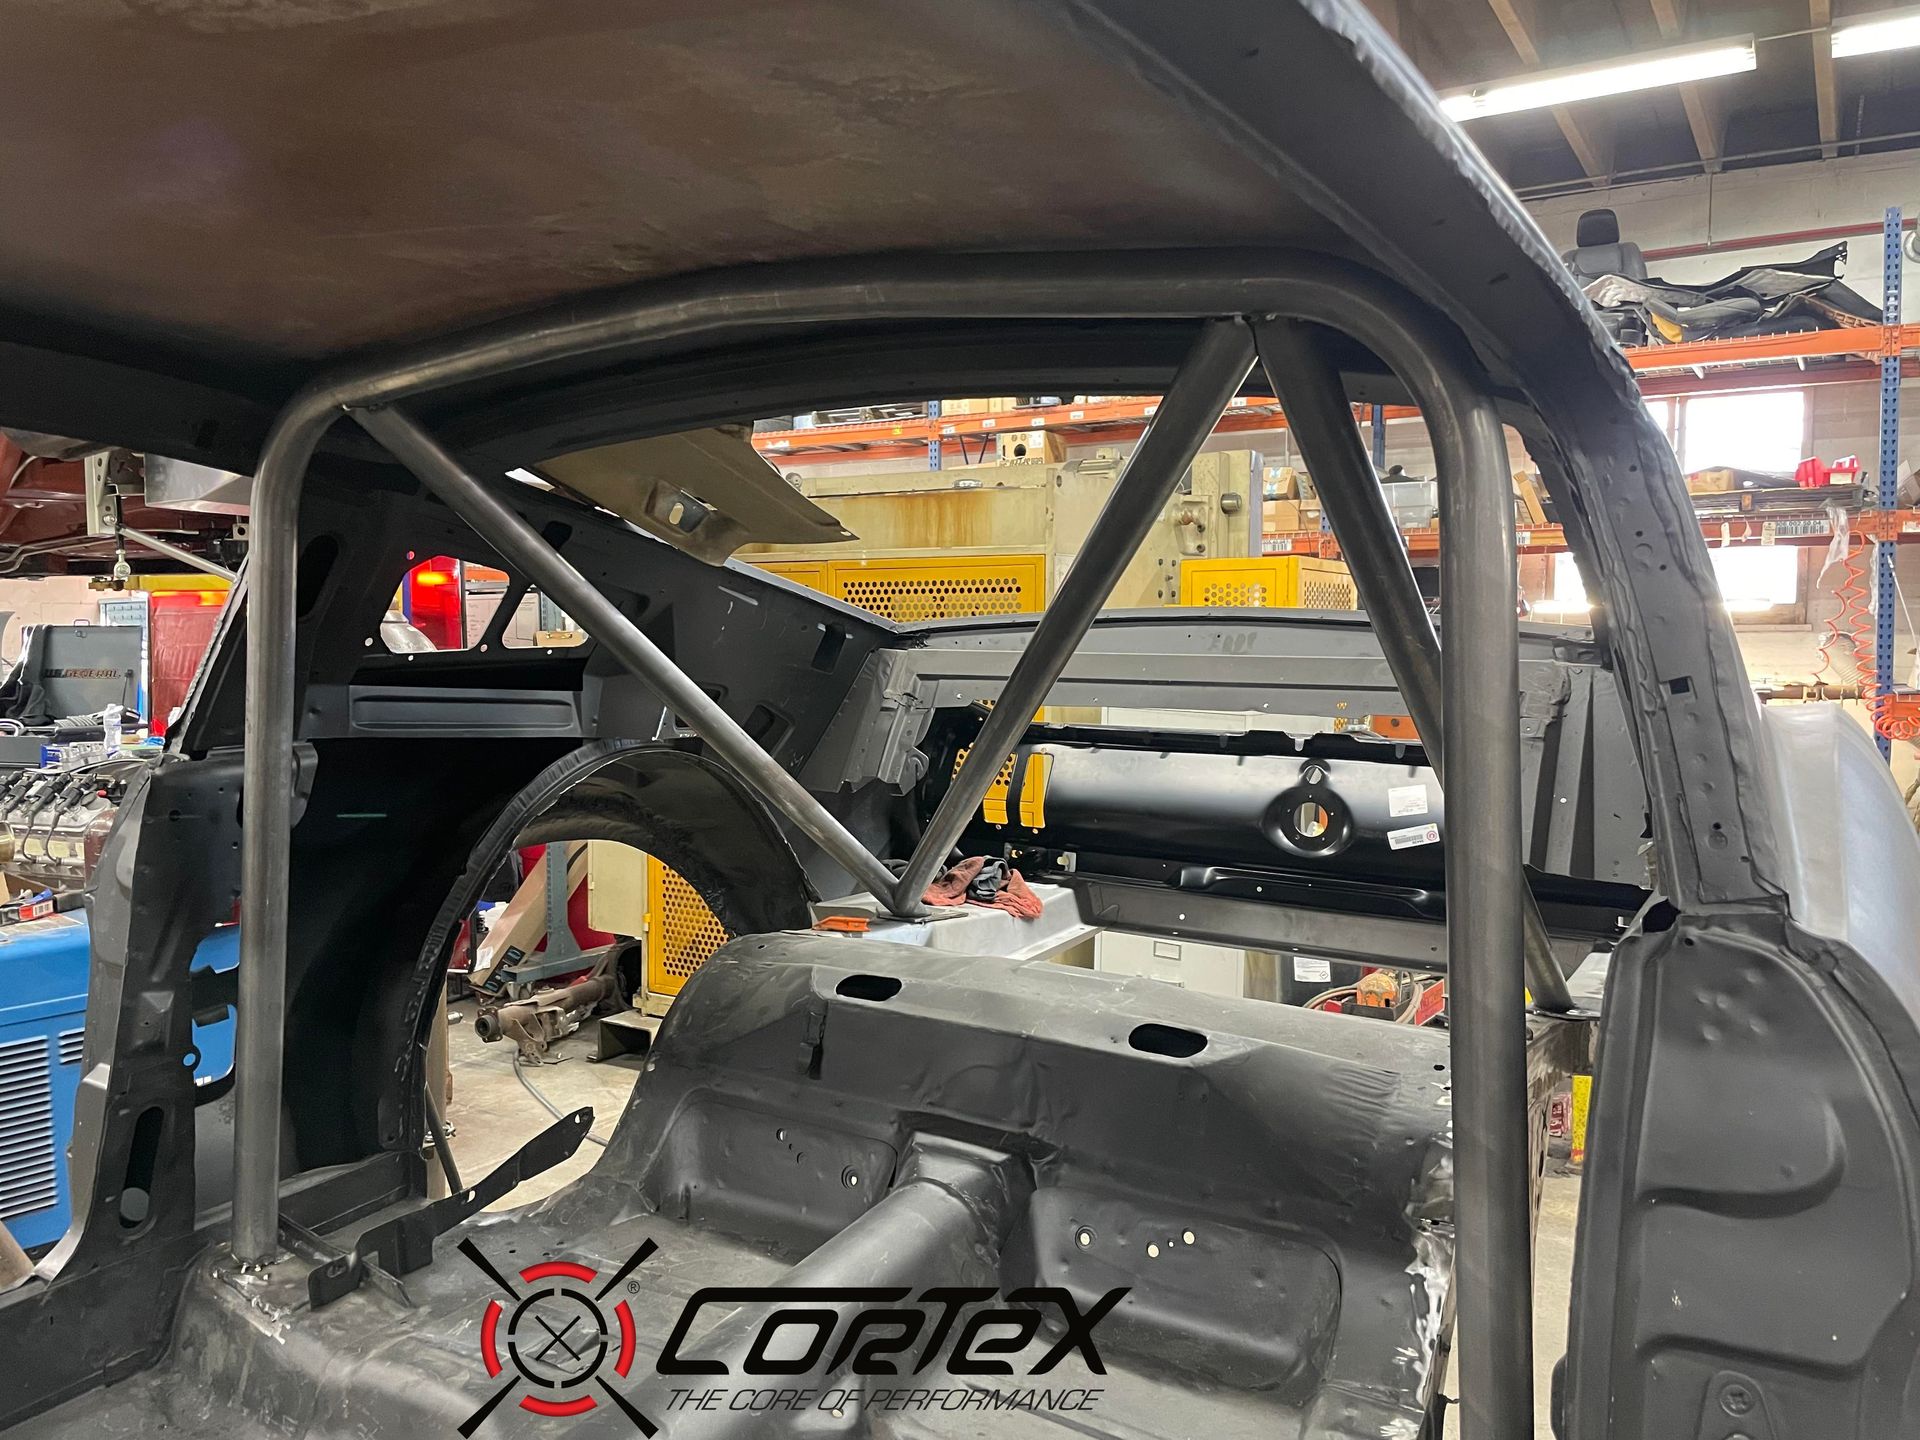
The customer elected not to do a full roll cage, but instead a rear hoop would be added to tie the backbone into the rear structure of the chassis. A full cage could easily be added at a later time if wanted.

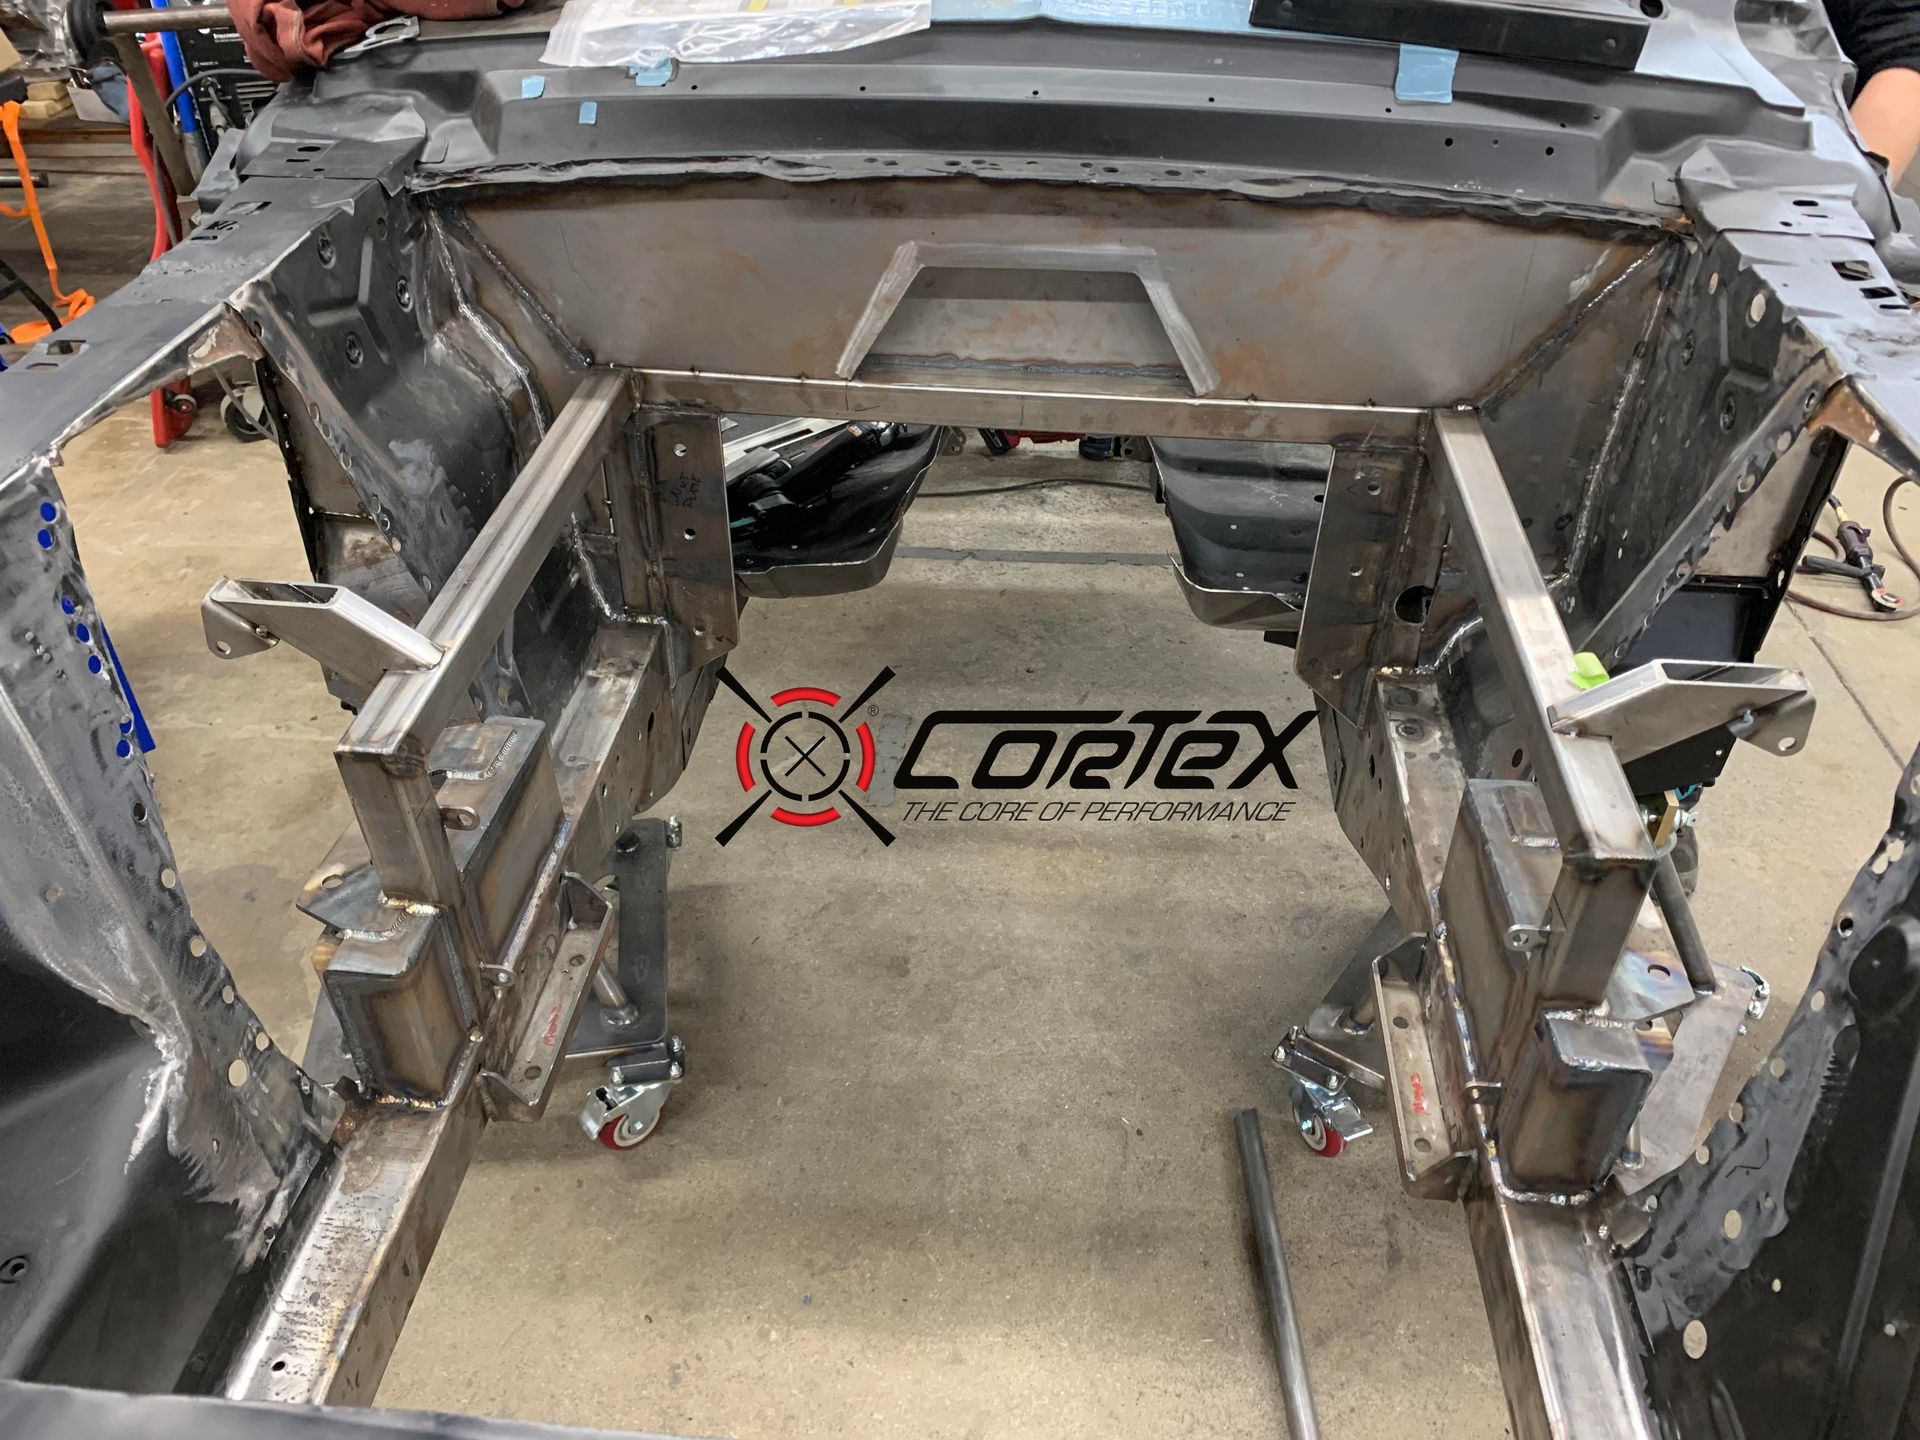
Next up, the team set about the creation of the engine cage which would contain the motor & transmission, as well as hold the shock towers & key suspension mounting bracketry. The firewall was also fabricated and adjusted to fit the LS7.
Part 2: It's Starting To Look Like A Car - Brakes, Steering, Suspension, & Wheels oh my!
The team has been hard at work on this project cranking through the various systems necessary to go from a bare body to a full fledged race car.
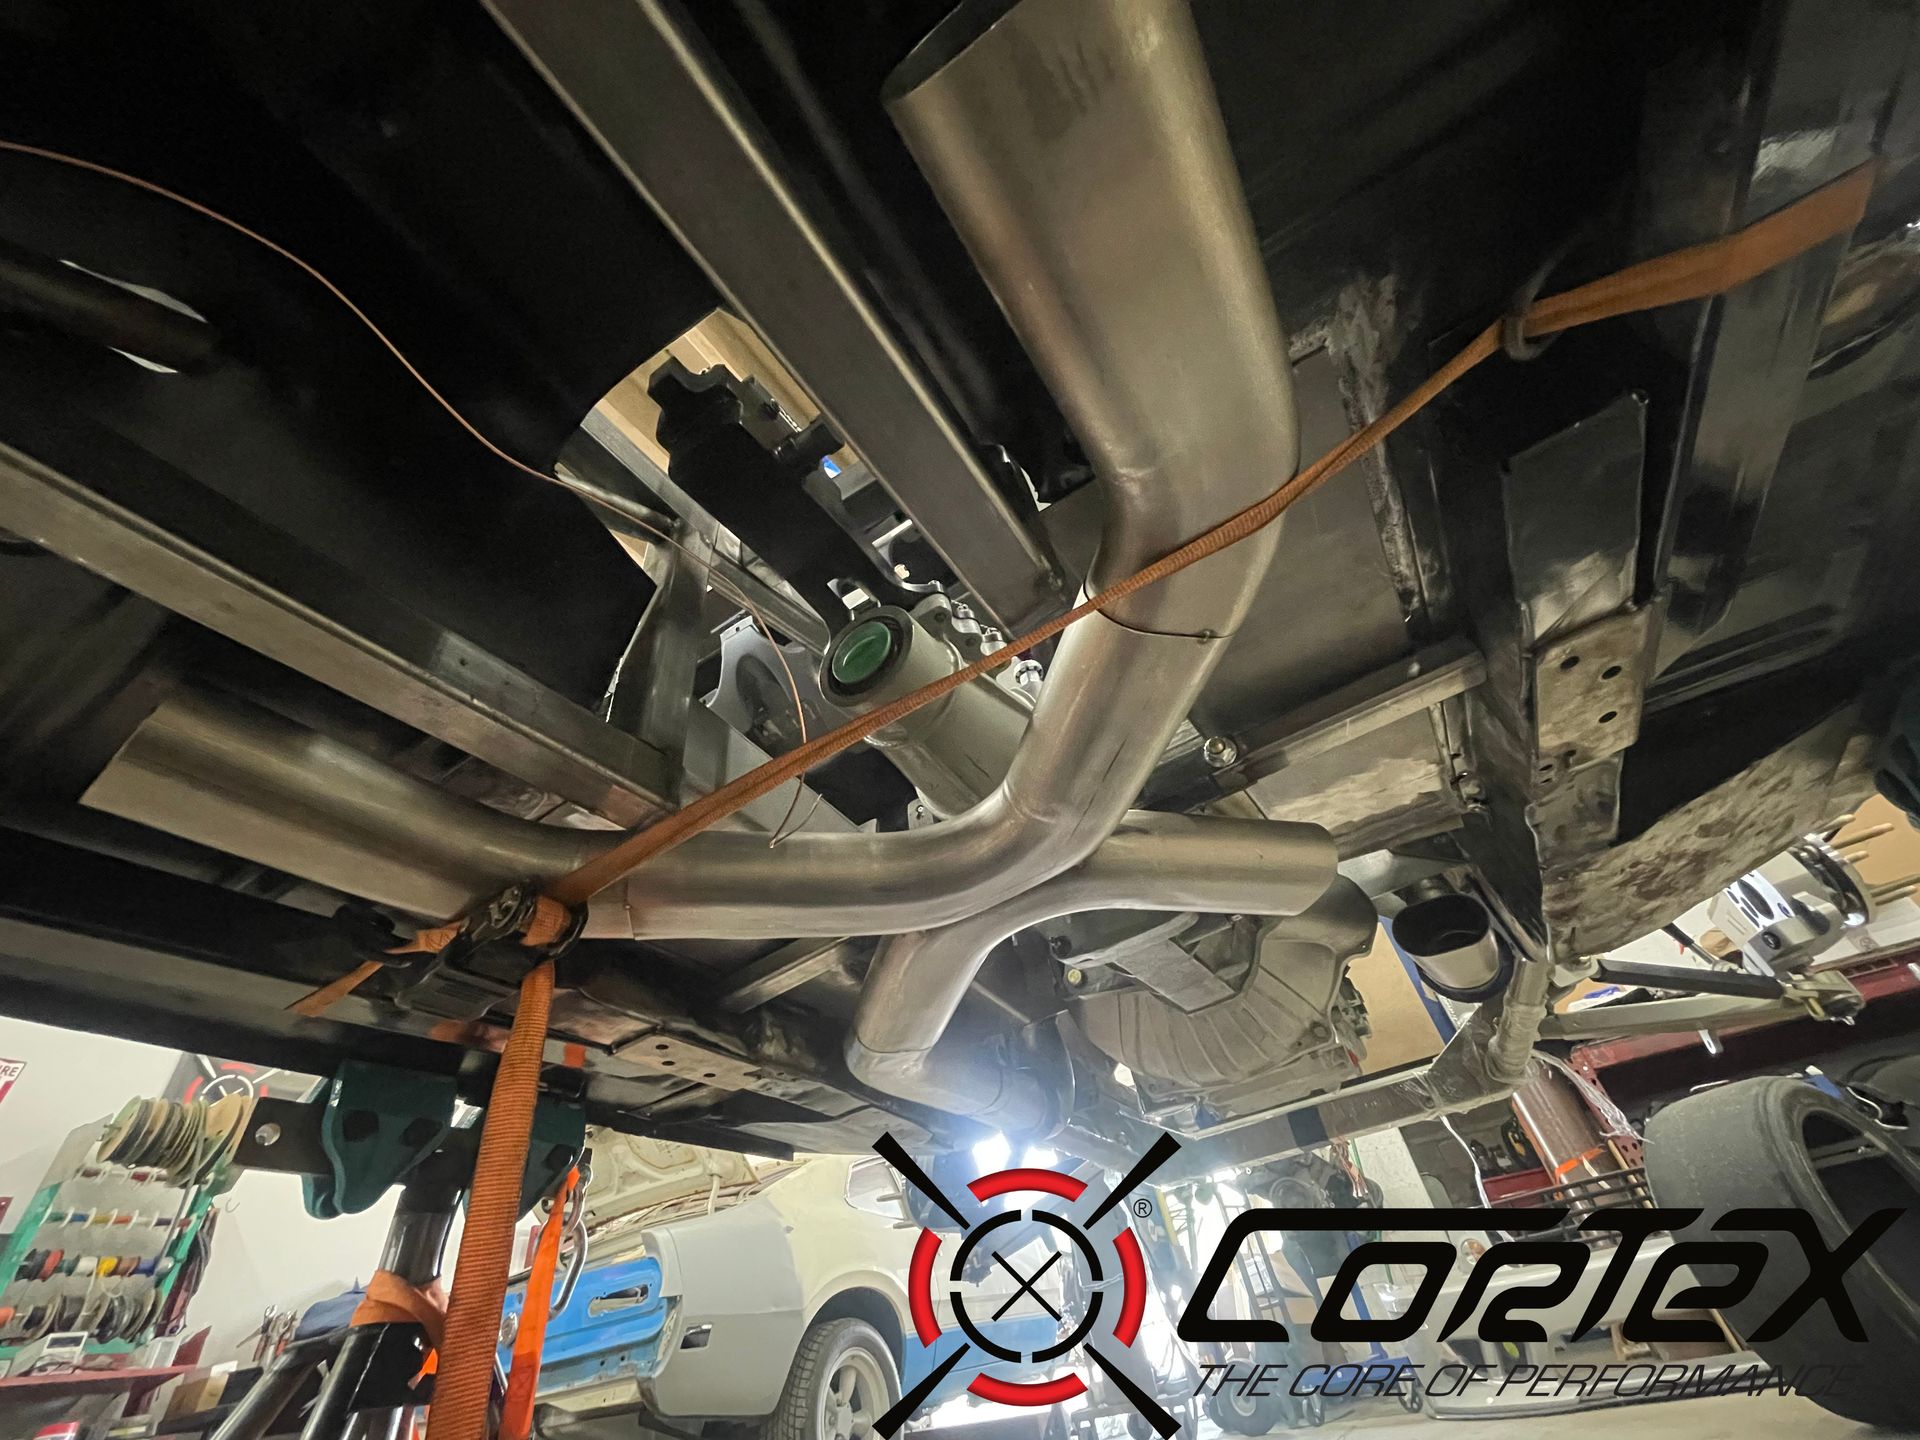
Mario has done fantastic work getting the powertrain to fit properly in the car. We're utilizing a G-Force 5 speed gearbox which fits nicely into the structural spine. Mario also fabricated a unique thru-frame rail exhaust design which allows us to keep the piping up close to the body and out of under-car air flow.
In addition to the spine, the team began work on fitting our CorteX SLA front suspension system designed specifically for these cars. Our CorteX Racing SLA system utilizes a double A-arm design, along with a modern billet spindle, race grade steering components, and modern performance shocks. The results are superior handling characteristics courtesy of the radically improved geometry. The beauty of this system is that it is equally at home on the street as it is on the track. Proper spring rate & valving selection is critical and something we custom tailor to each unique build based on the customers intended use of the vehicle. This kit is available as a mail-order product designed to work with the factory first gen mustang frame rails. You can read more about this system here.
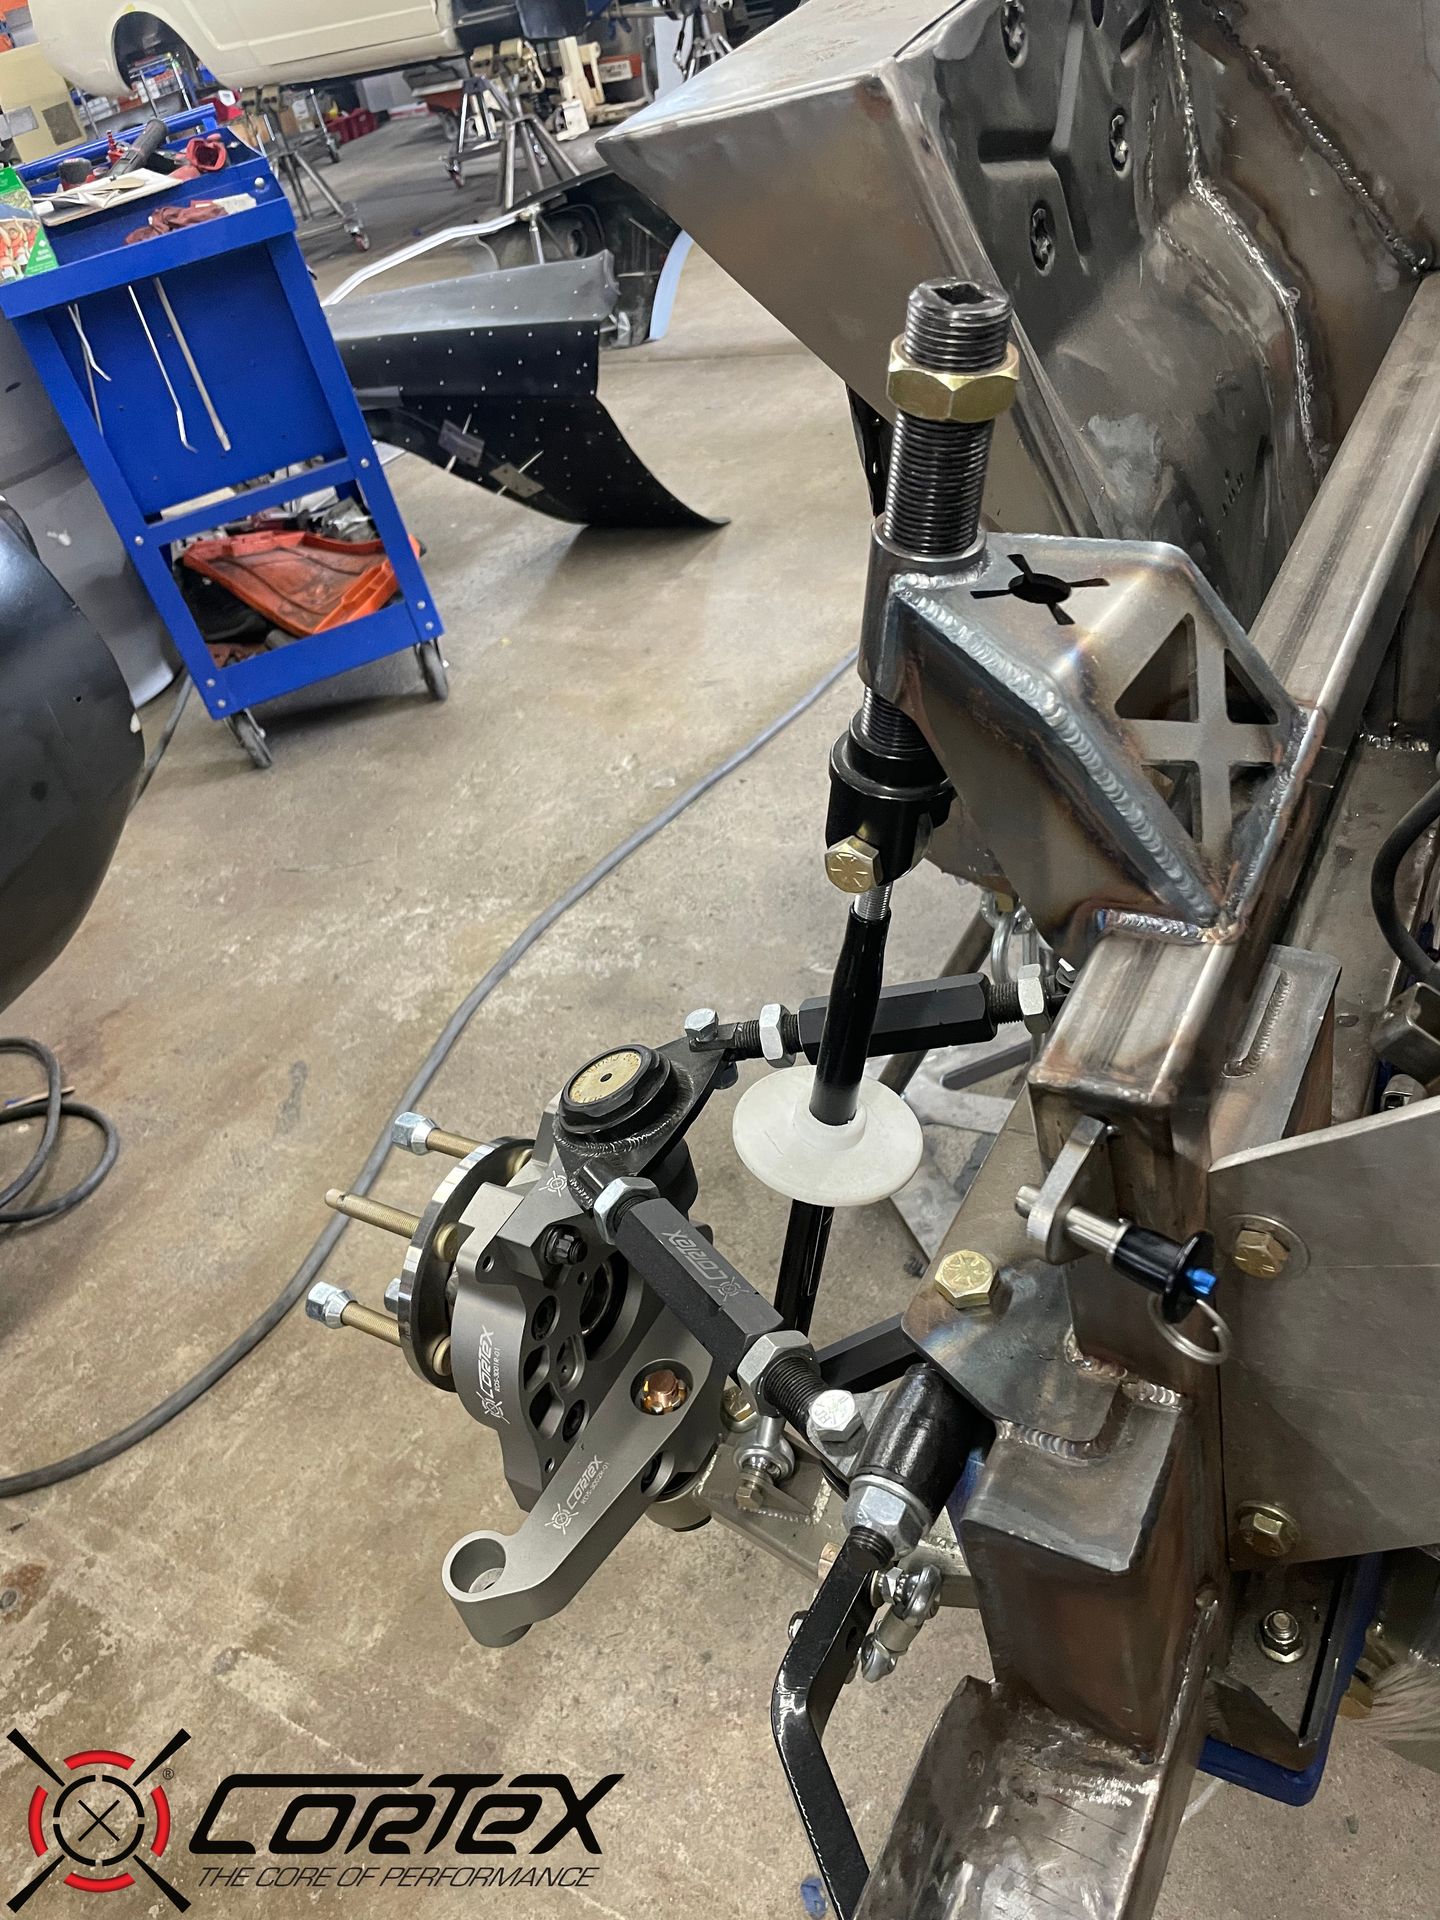
Another added benefit of the CorteX spindles is the utilization of late model GT350 style wheel hubs and the ability to mount a plethora of different modern calipers. Given this car's purpose, it is going to handle and stop better than most modern super cars. We'll touch on the brakes for this build further in the article.
If you want to read about our suspension offerings and special considerations when planning your build, you can read on here.
Out back, we utilize the CorteX Xtreme Grip rear suspension system featuring our watts link & torque arm setup. Available in both 8.8" and 9", our Mustang rear suspension package fixes the poorly controlled rear axle/suspension found on these early year Mustangs. The combination of our watts link & torque arm is a proven winning combination on both restomod and late model Mustangs.
This customer elected to go with our CorteX Cambered Rear 8.8" Axle. Also available in both 8.8" and 9" the CorteX cambered rear axle utilizes a CV bearing drive system to achieve a range of different cambers as requested by the customer. While there are other cambered axles on the market, they require near constant maintenance due to the outboard splines needing to be frequently regreased. Because we use an inboard CV drive, the amount of maintenance is dramatically reduced.
You can read more about this specific rear end setup here which is available as a mail-order kit as well.
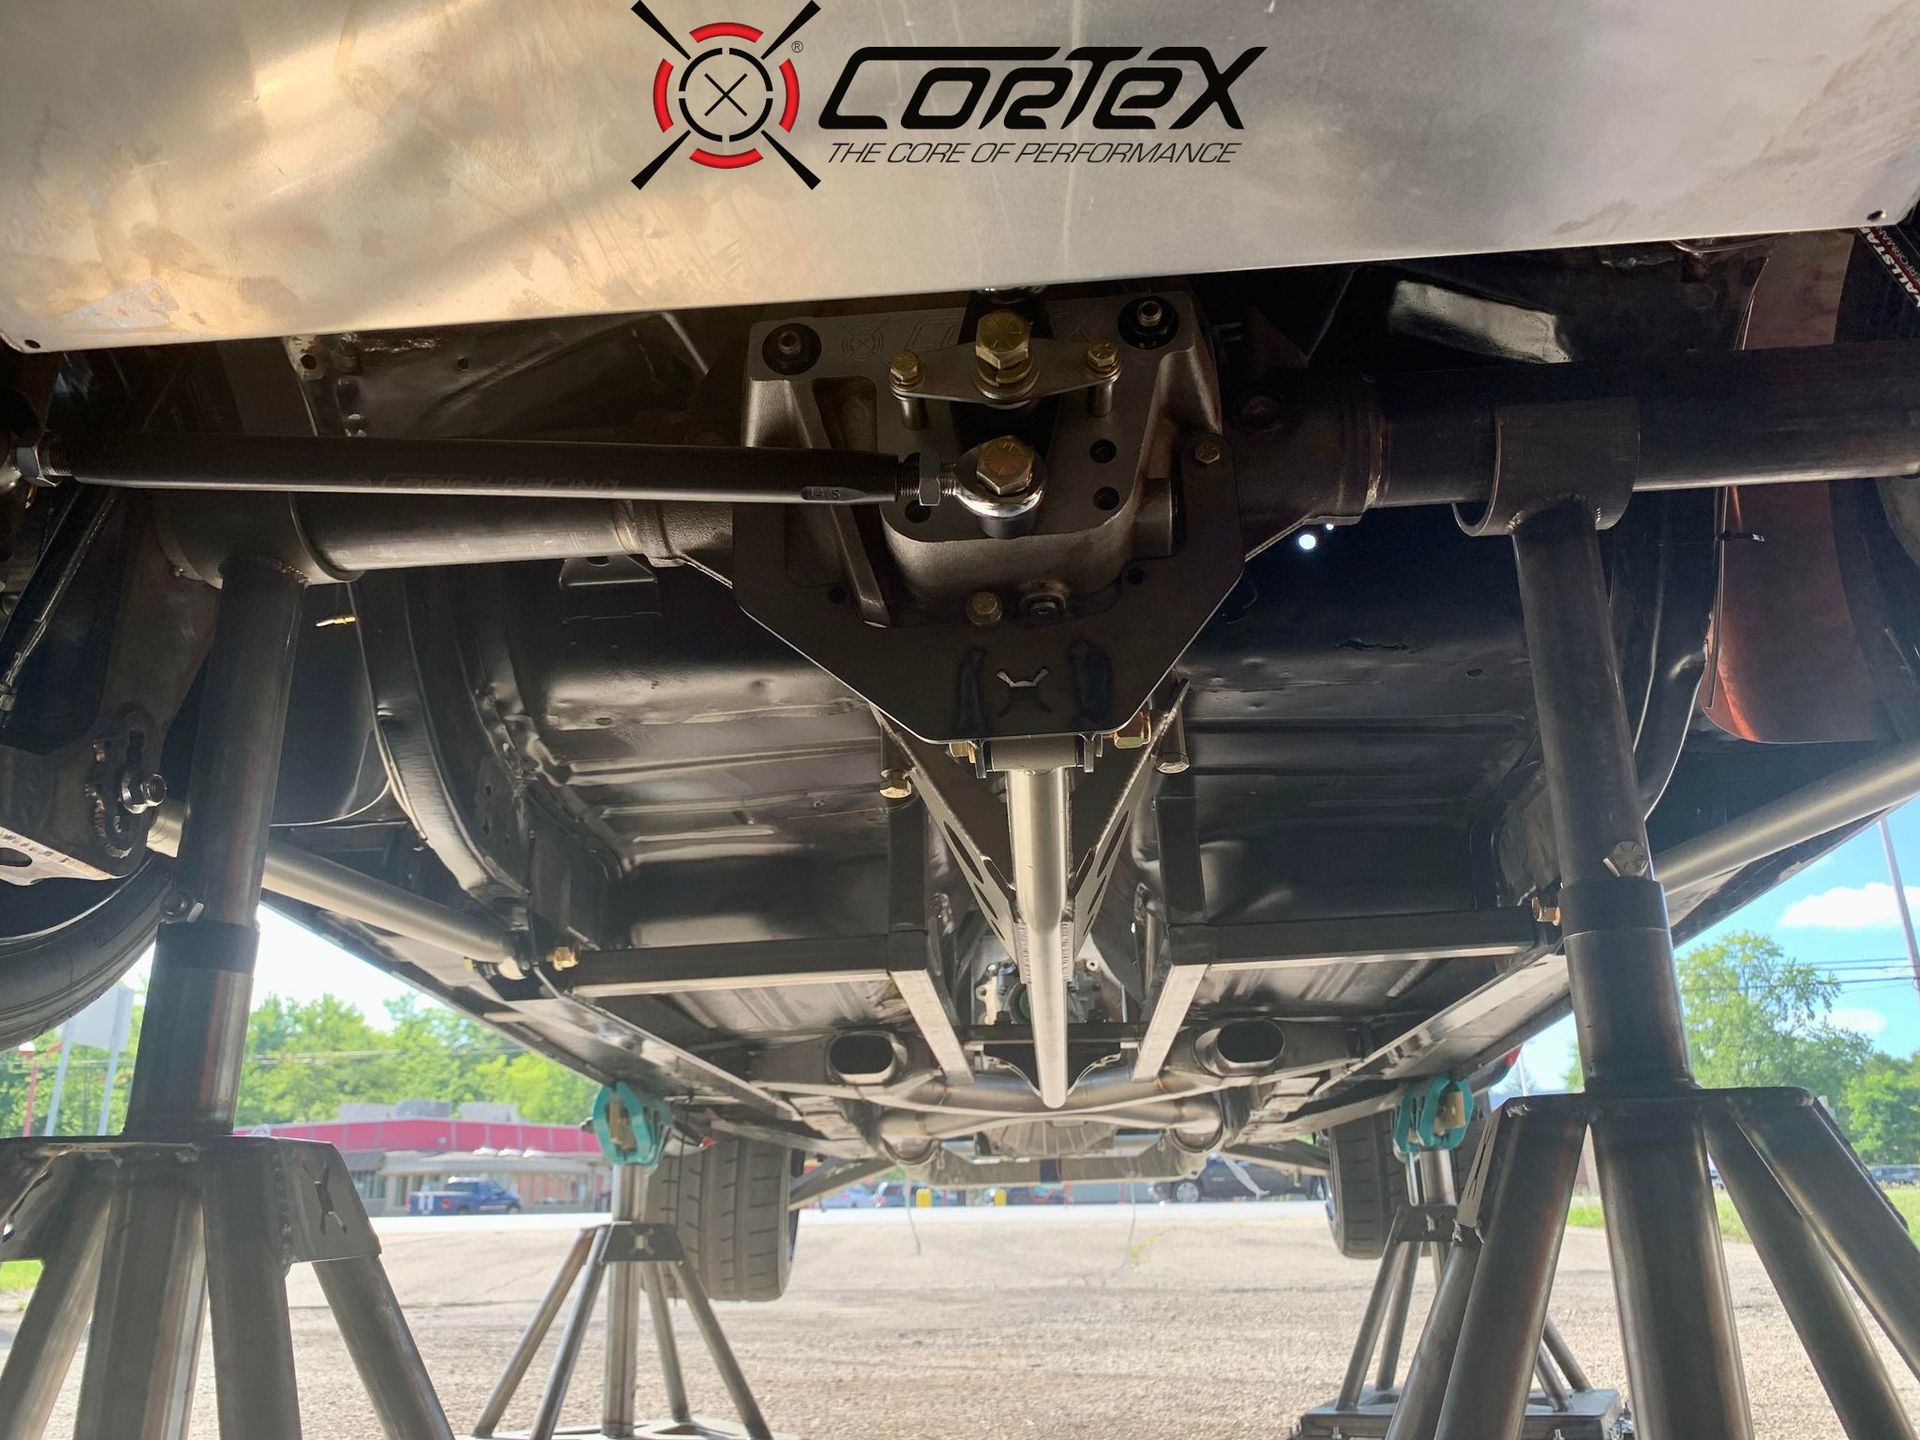
Here you can really see the thoughtful design of the underside of the car in all it's glory. With the rear end, transmission & engine, torque arm, and watts link all mocked up into their final resting positions, the car is really beginning to take shape.

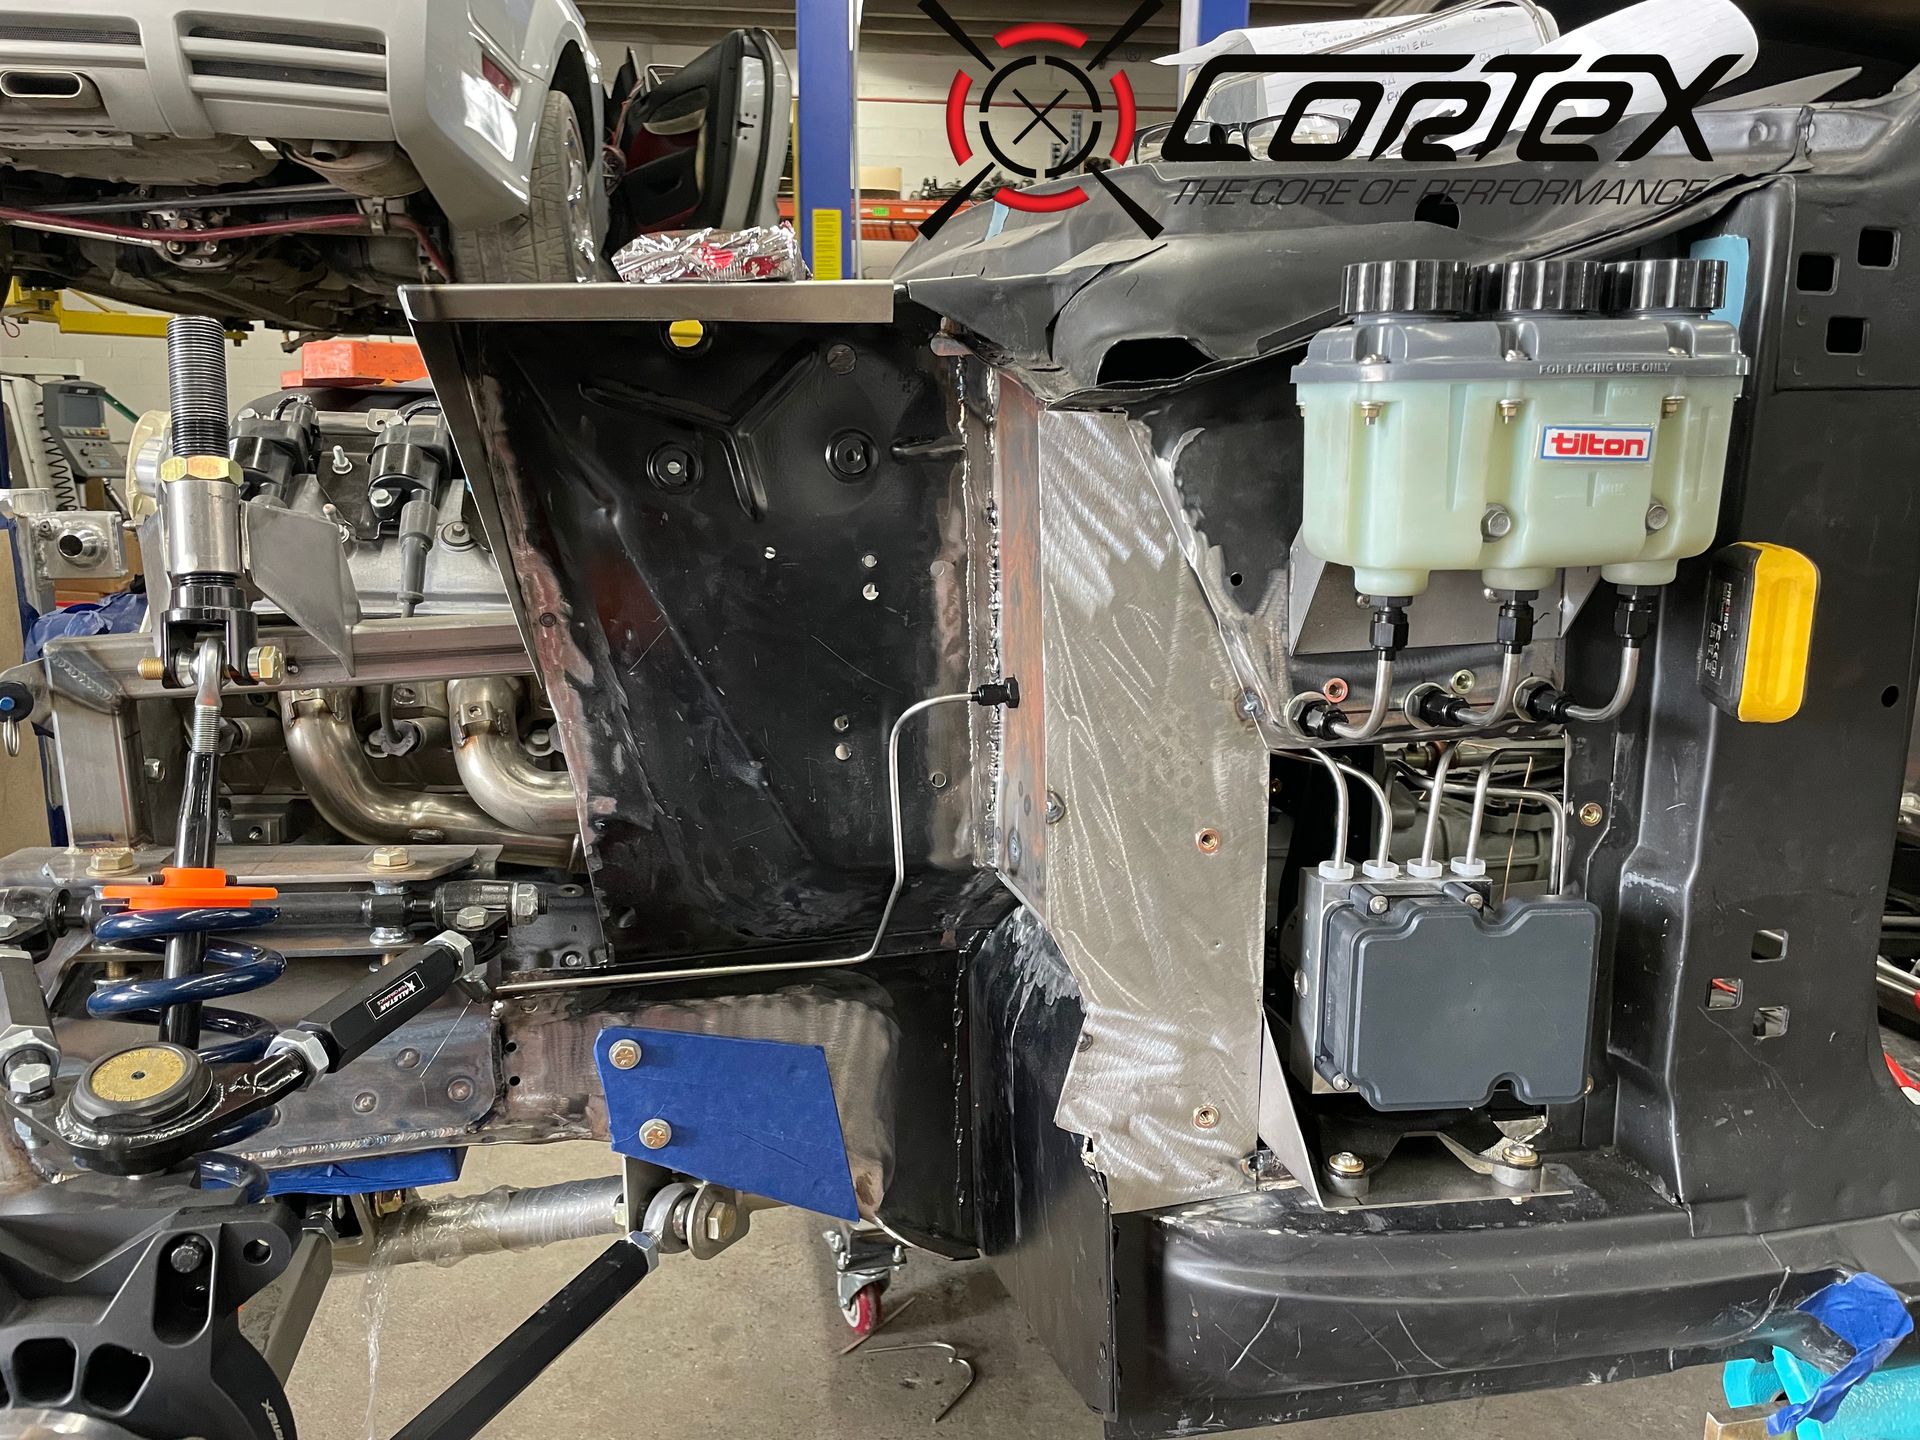
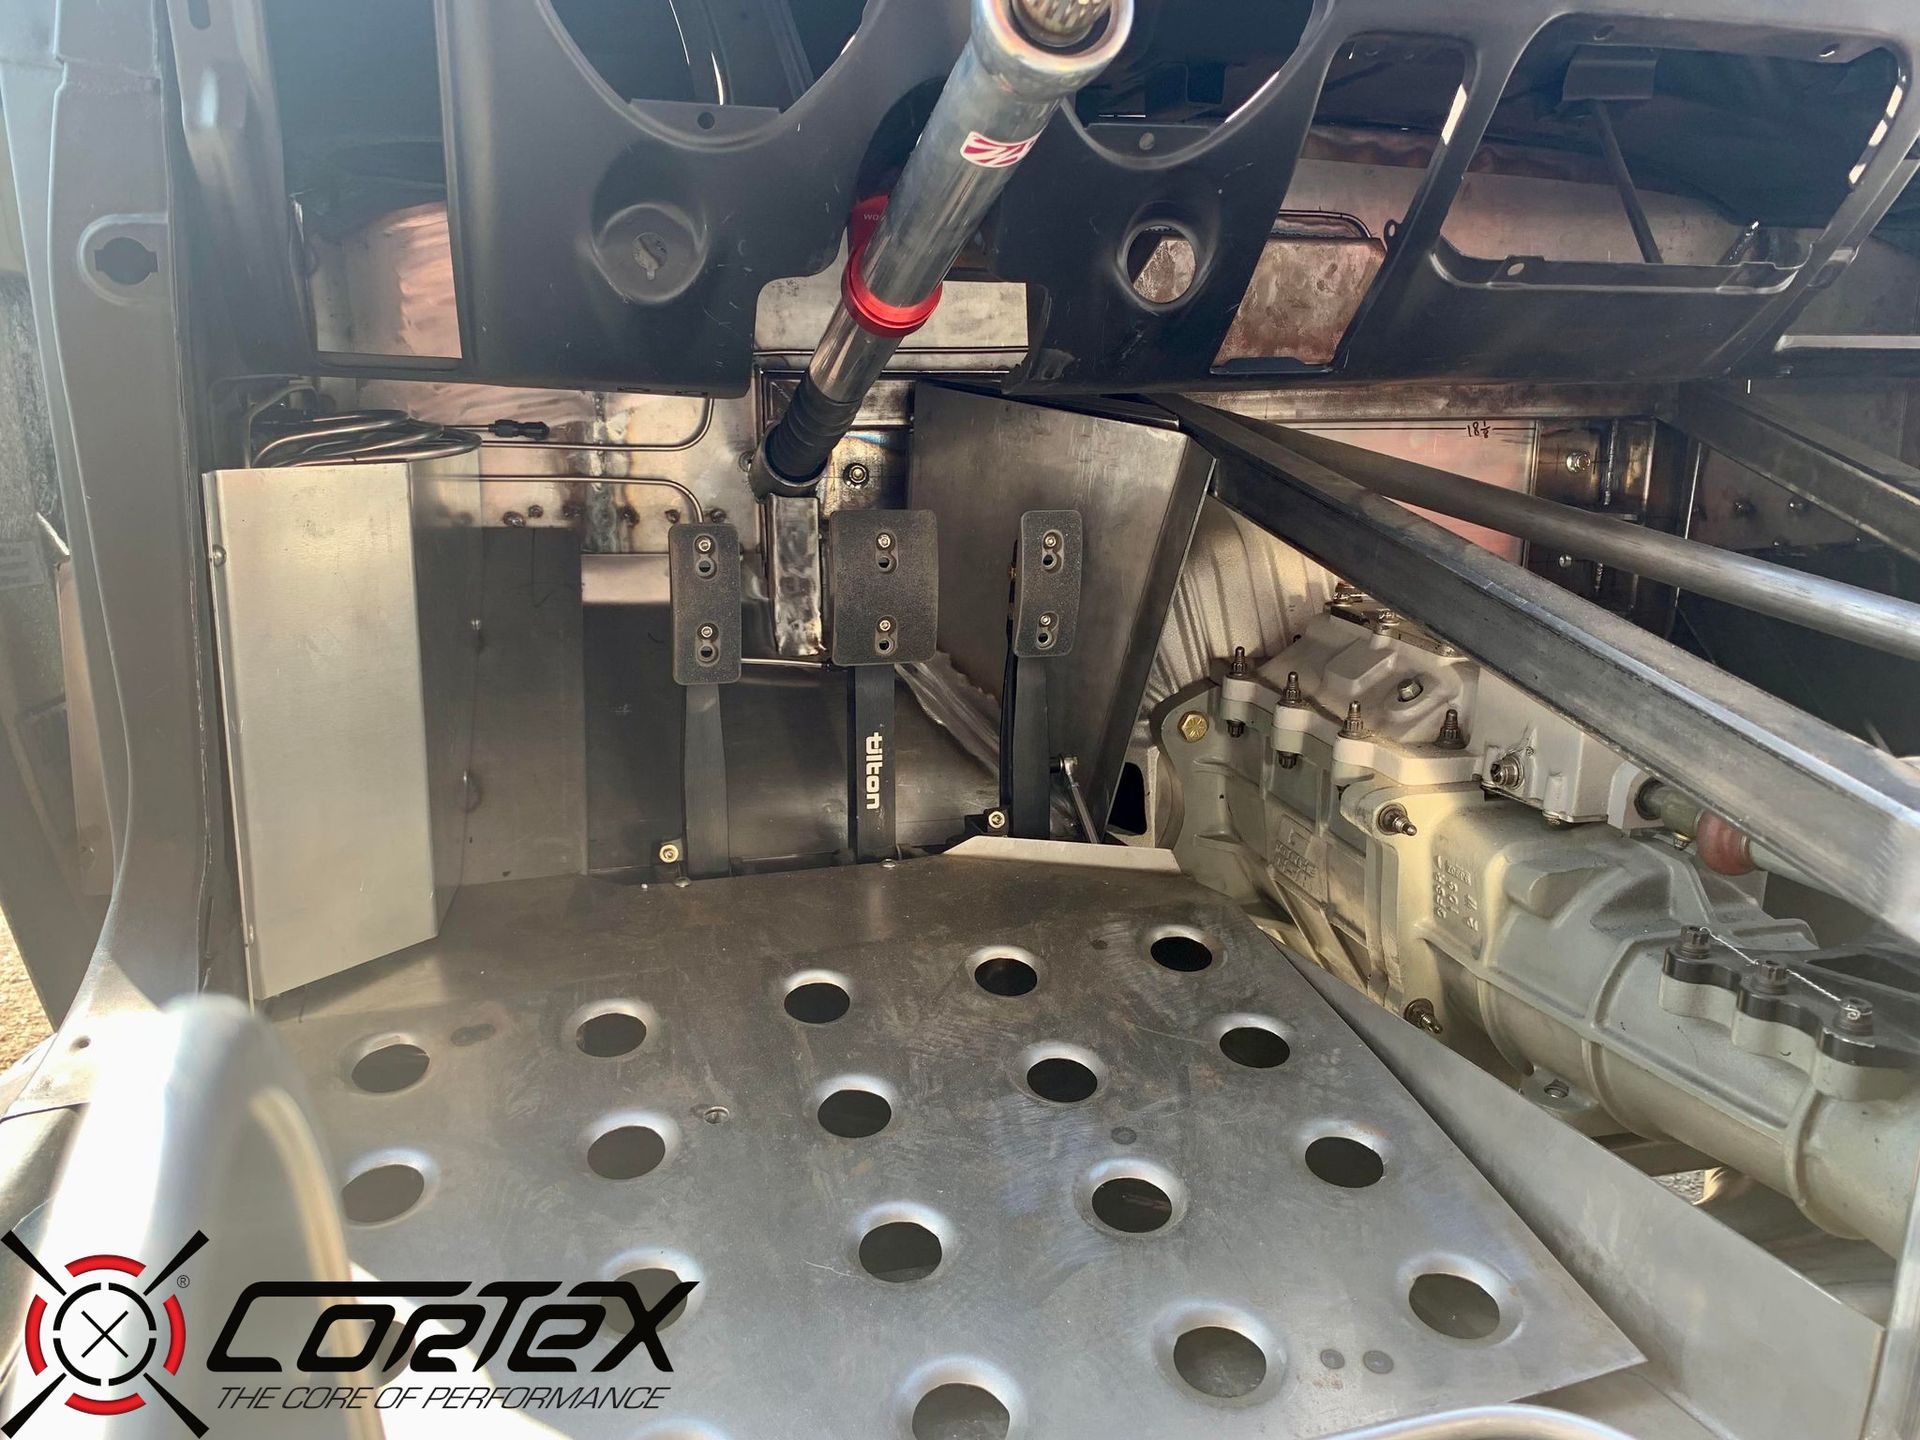
With the suspension pretty far along, the team turned to steering, brakes, and interior next. This car is going to feature a Bosch ABS module with a Tilton pedal assembly. Due to the customer's request for a clam-shell style removable front body, we were able to get creative with the mounting of the Bosch unit and the master cylinder & reservoirs. Mario found a great spot to tuck it up out of the way behind the fender. This allows us to retain as much of the footwell as possible and maintain a somewhat factory looking interior.
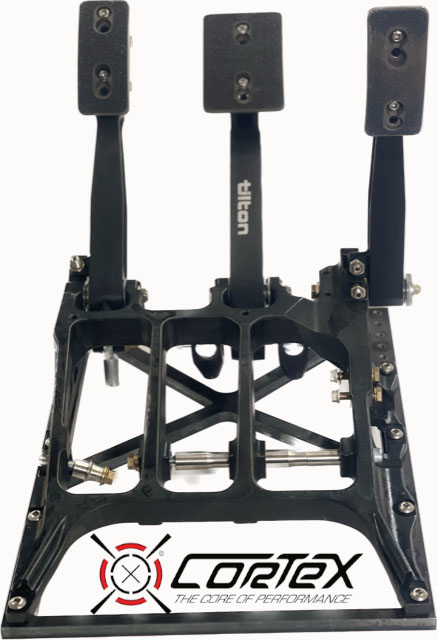
We quickly realized that there was not a commercially available quality adjustable steel pedal box mount for the Tilton 850 series that would stand up to the rigors of road course use. Naturally, we decided to make our own. If you're looking for an adjustable Tilton pedal box for your Vintage Mustang or race car build, the mount is available here.
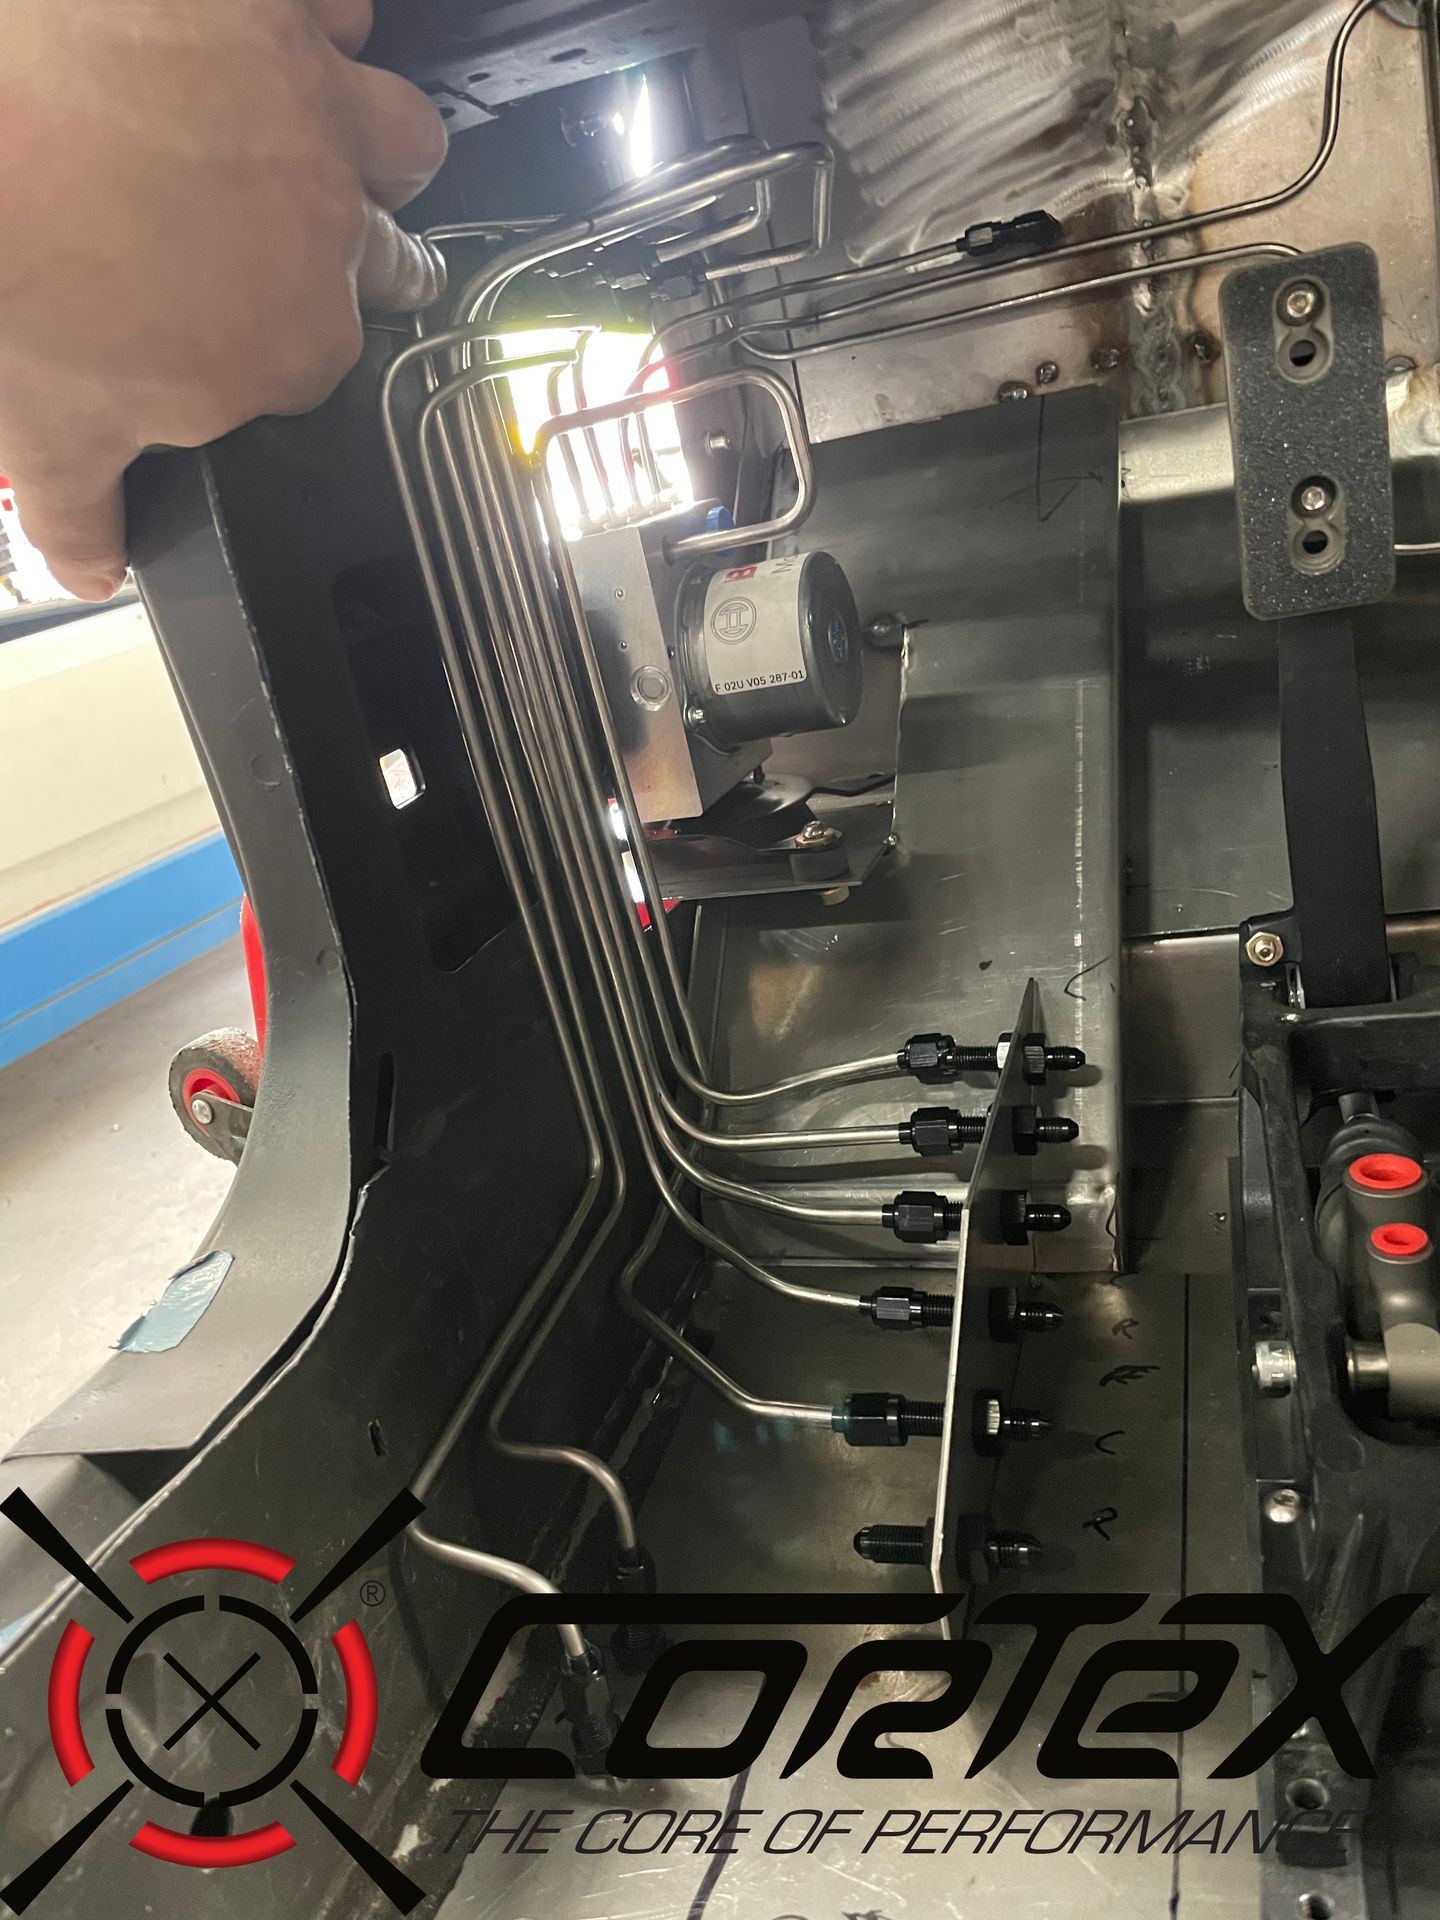
Mario & Matt killed it with the line routing for the car. We almost felt bad covering it up.
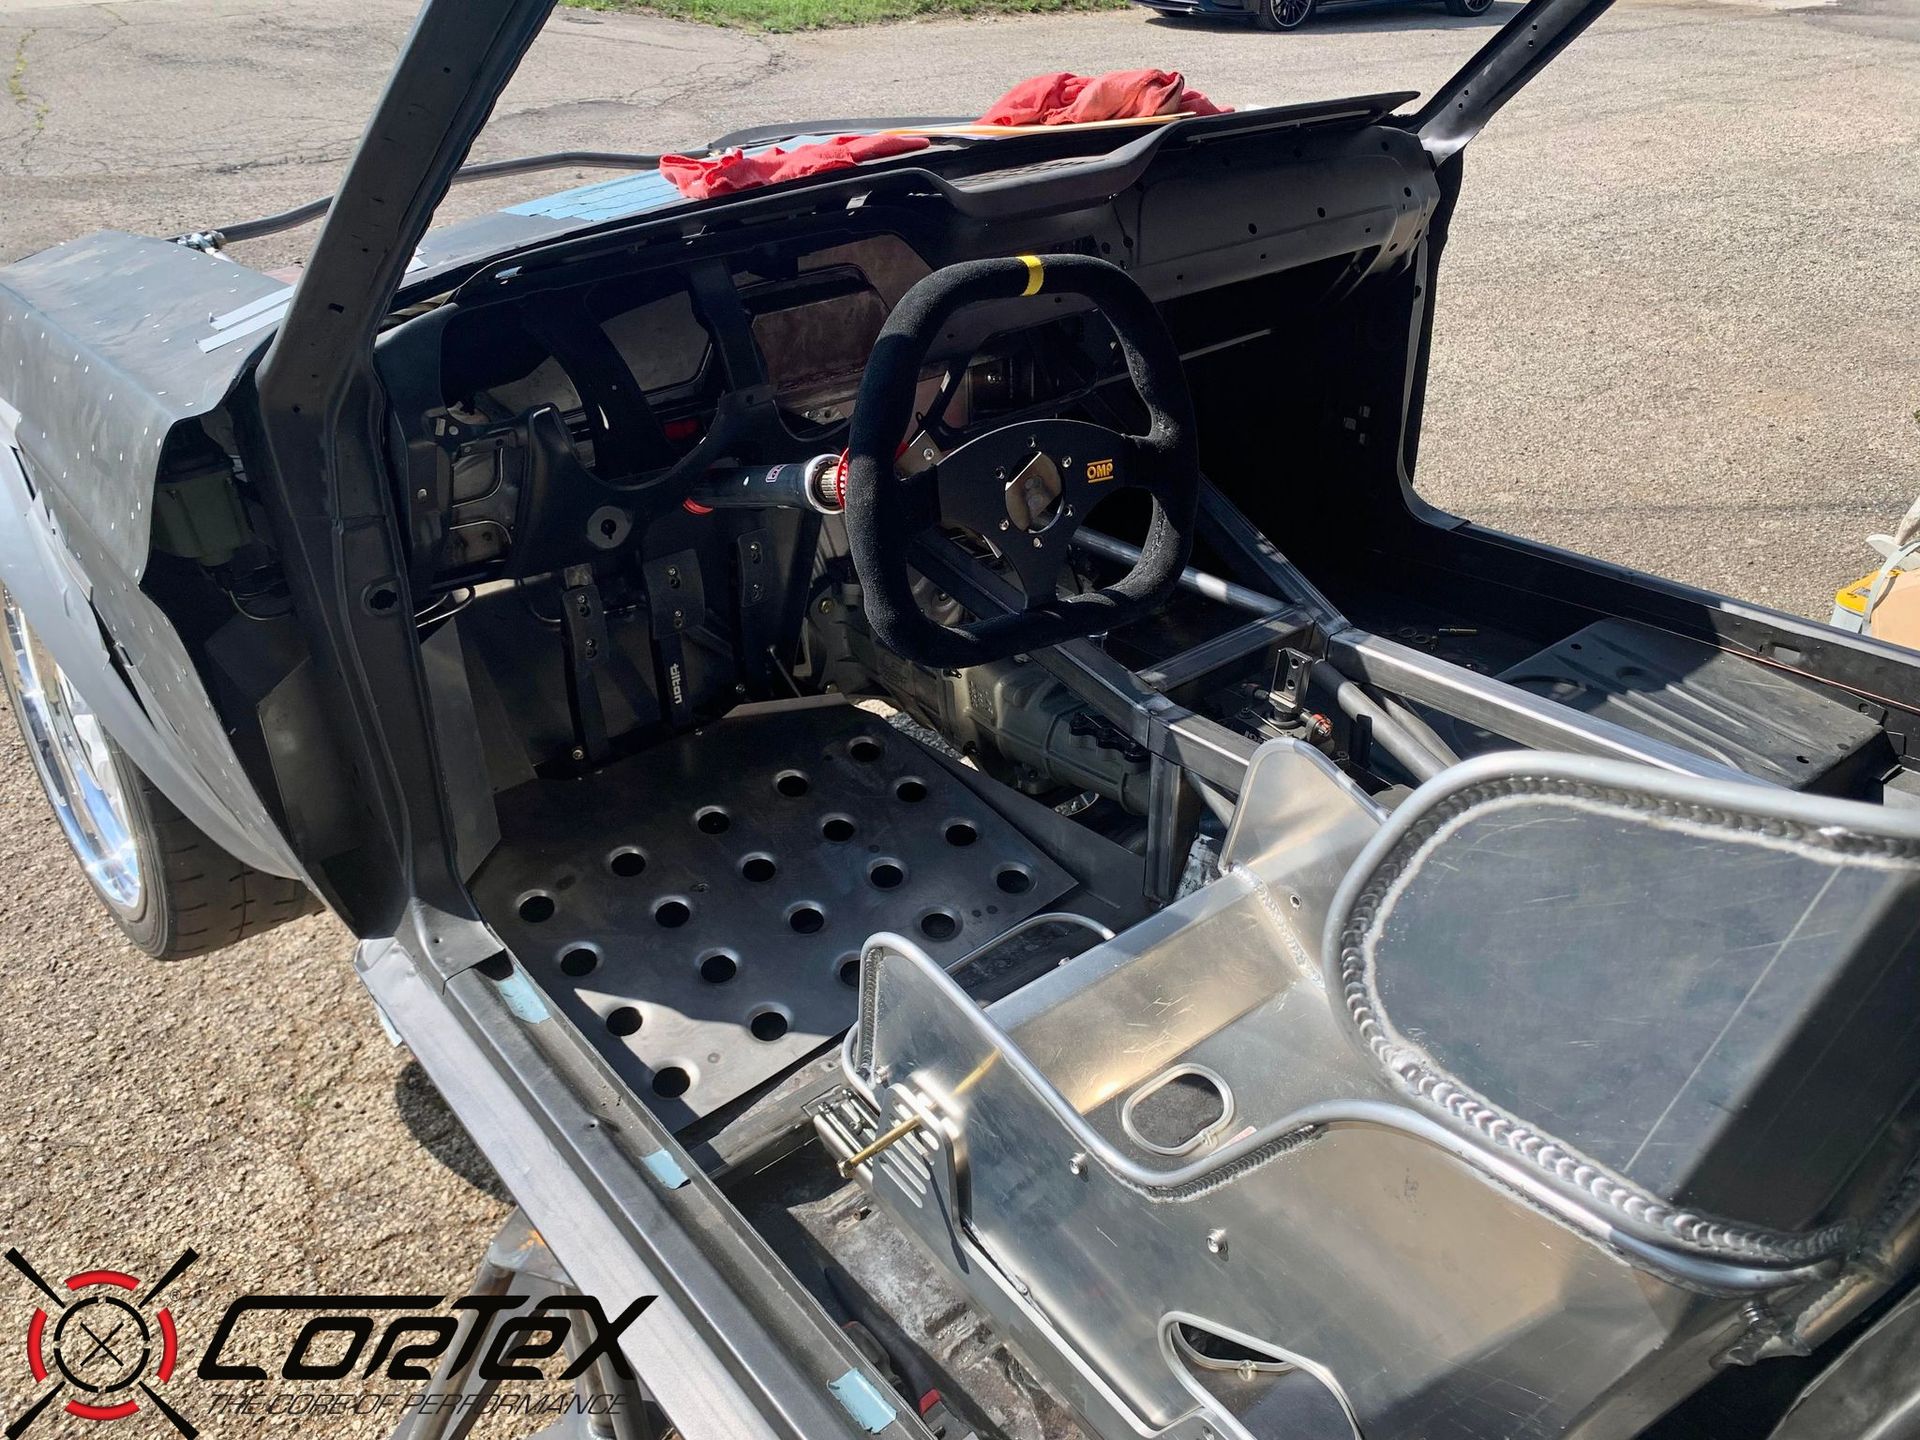
Here you can see the mostly finished product for the pedal box and footwell setup. Also visible is the steering column that we installed while finishing off the firewall.
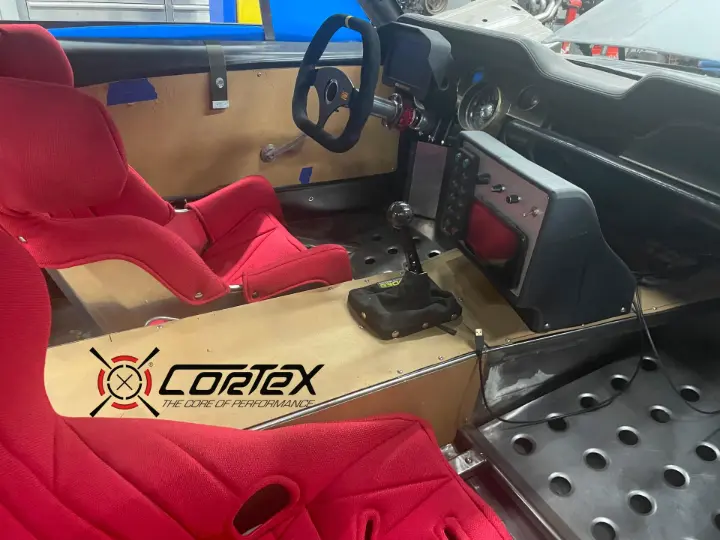
With the pedal box finished, we took the time to test fit the seat & steering wheel that will be used on this build. You can also see the cover we made to protect the ABS unit just inside of the front fender.
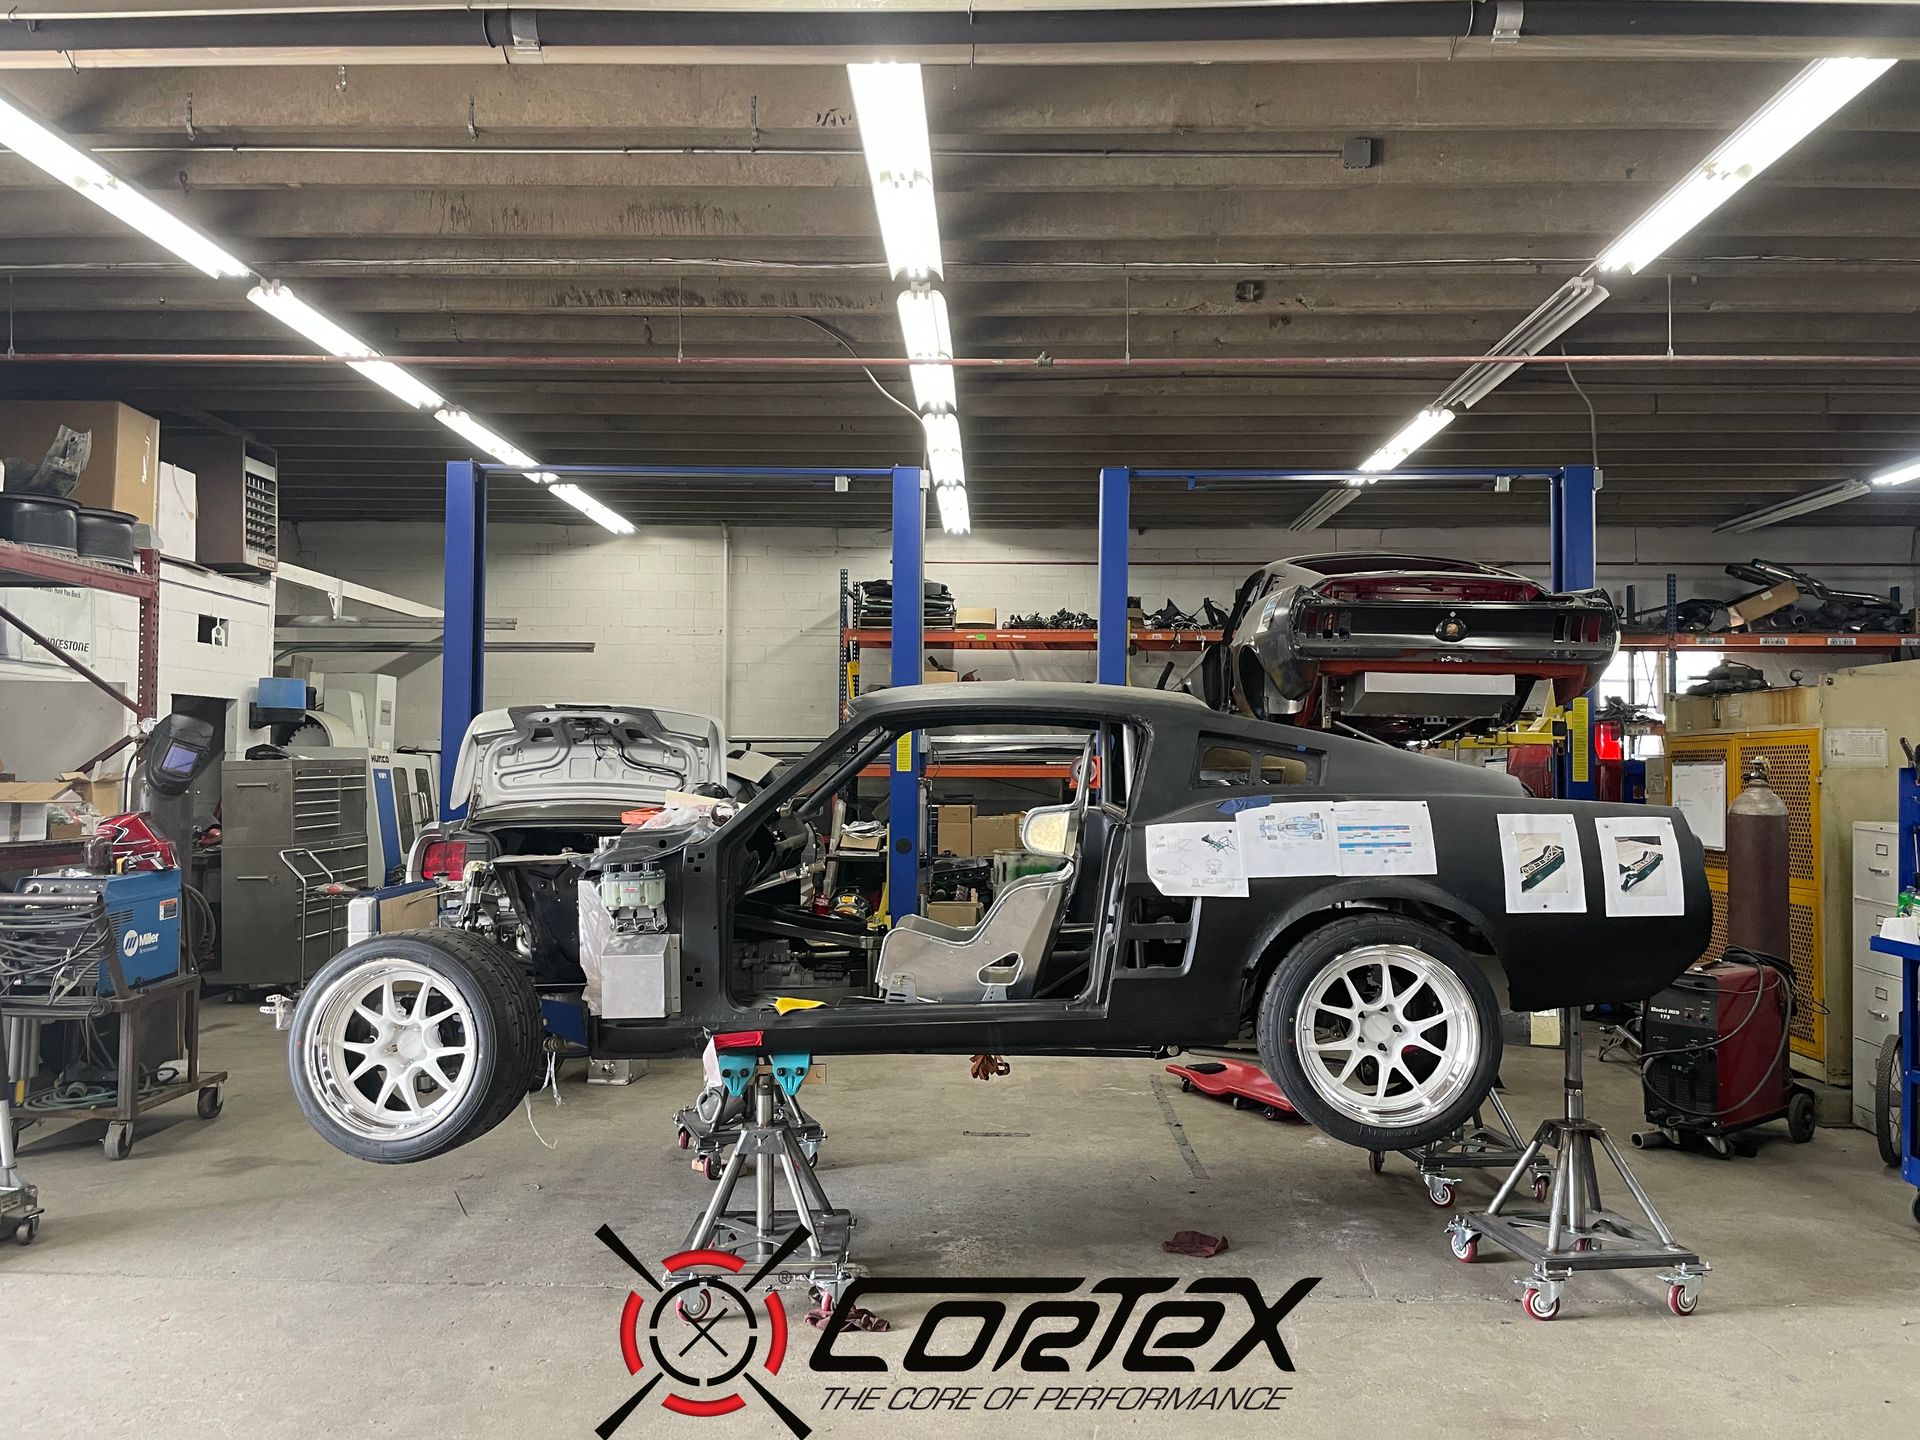
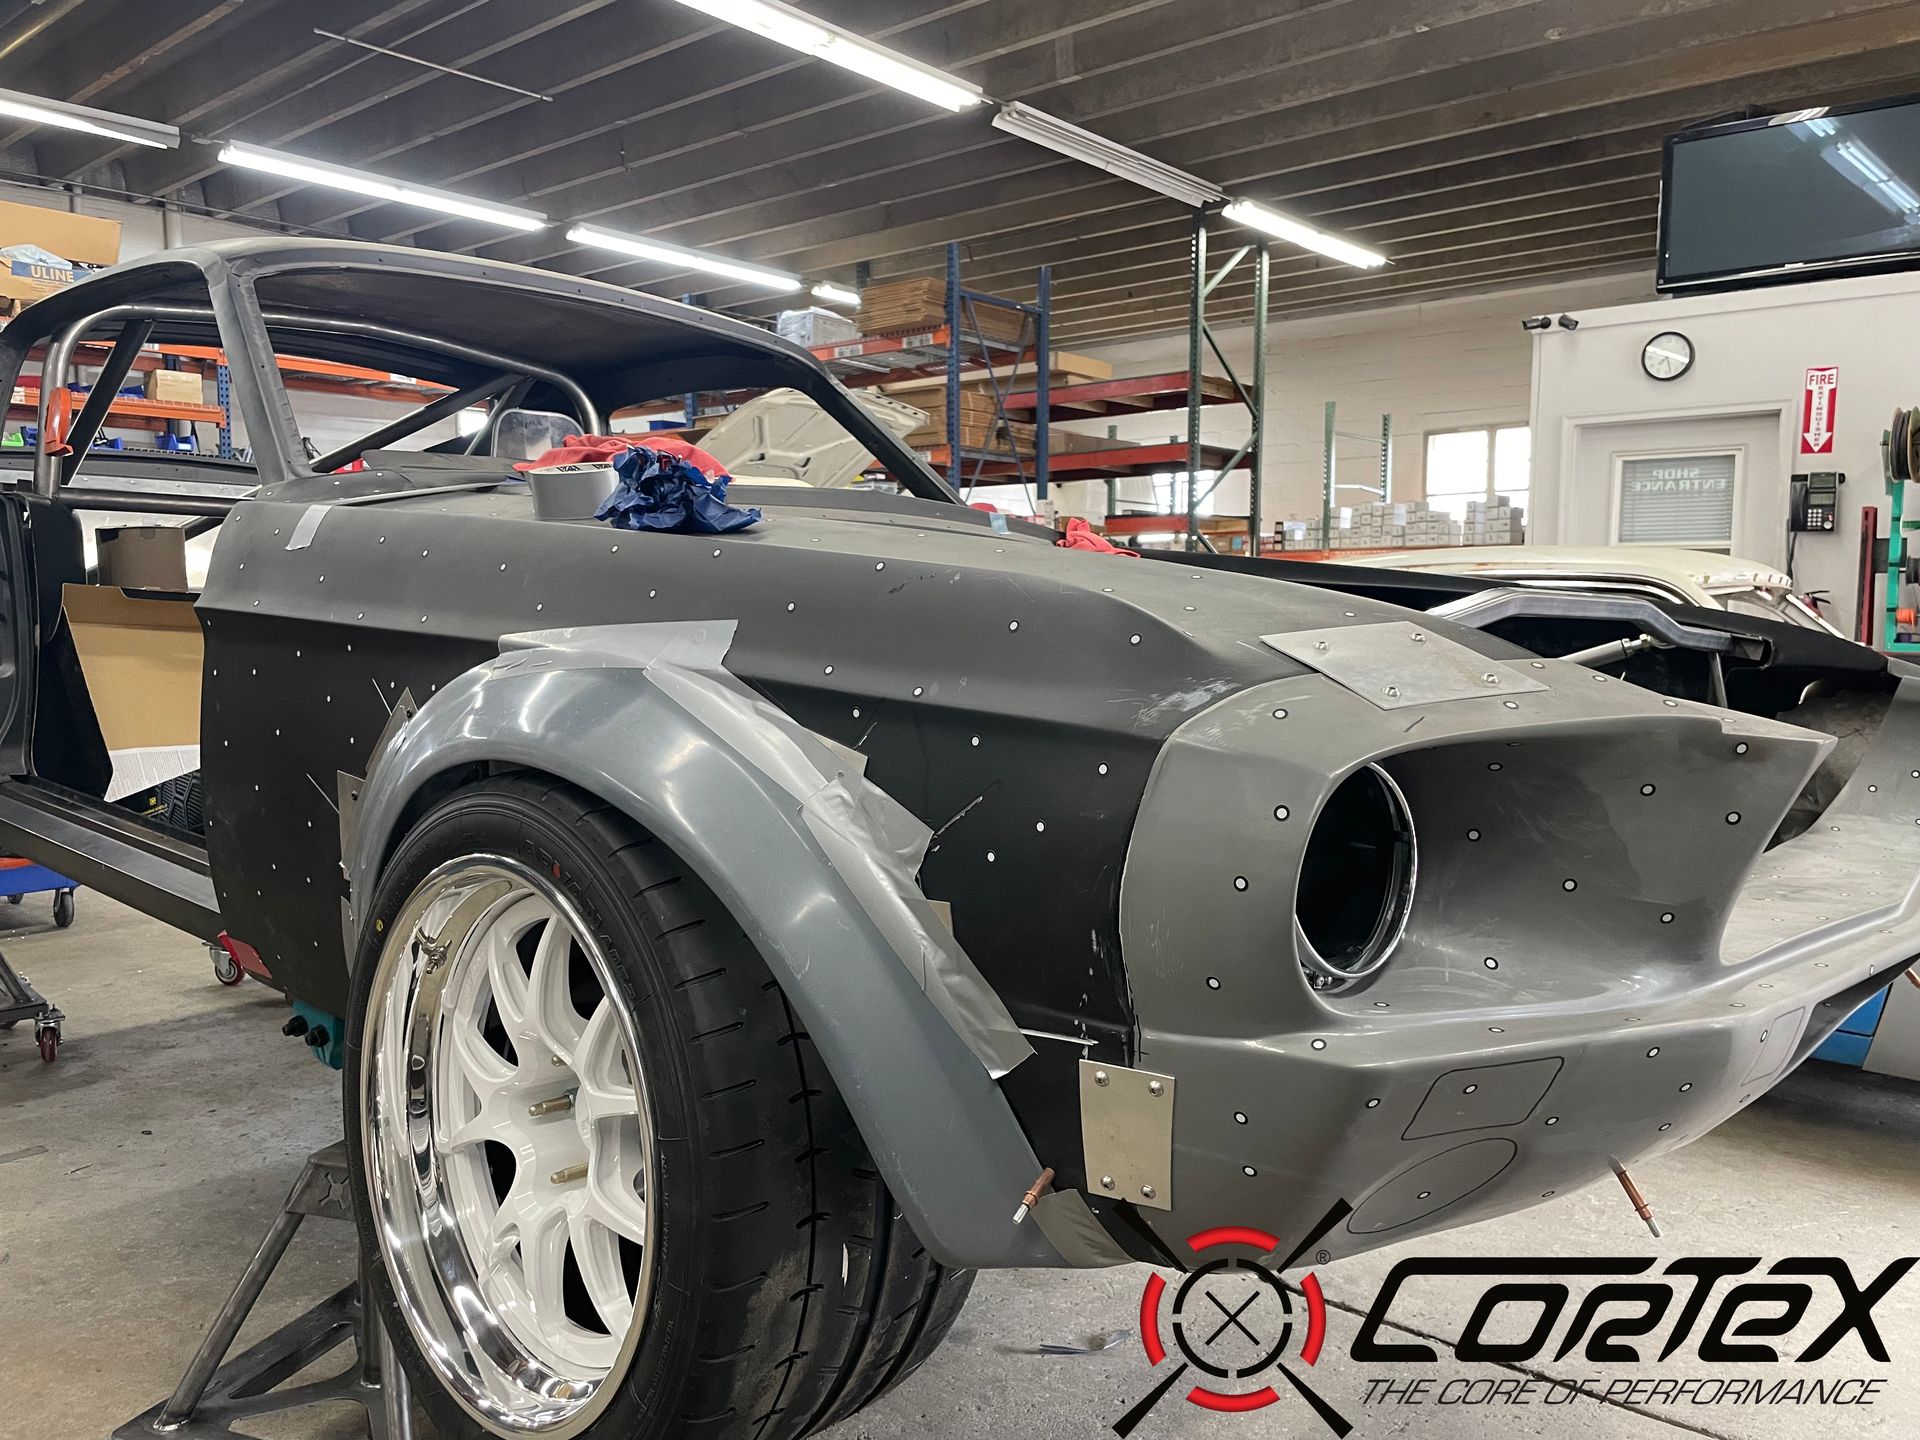
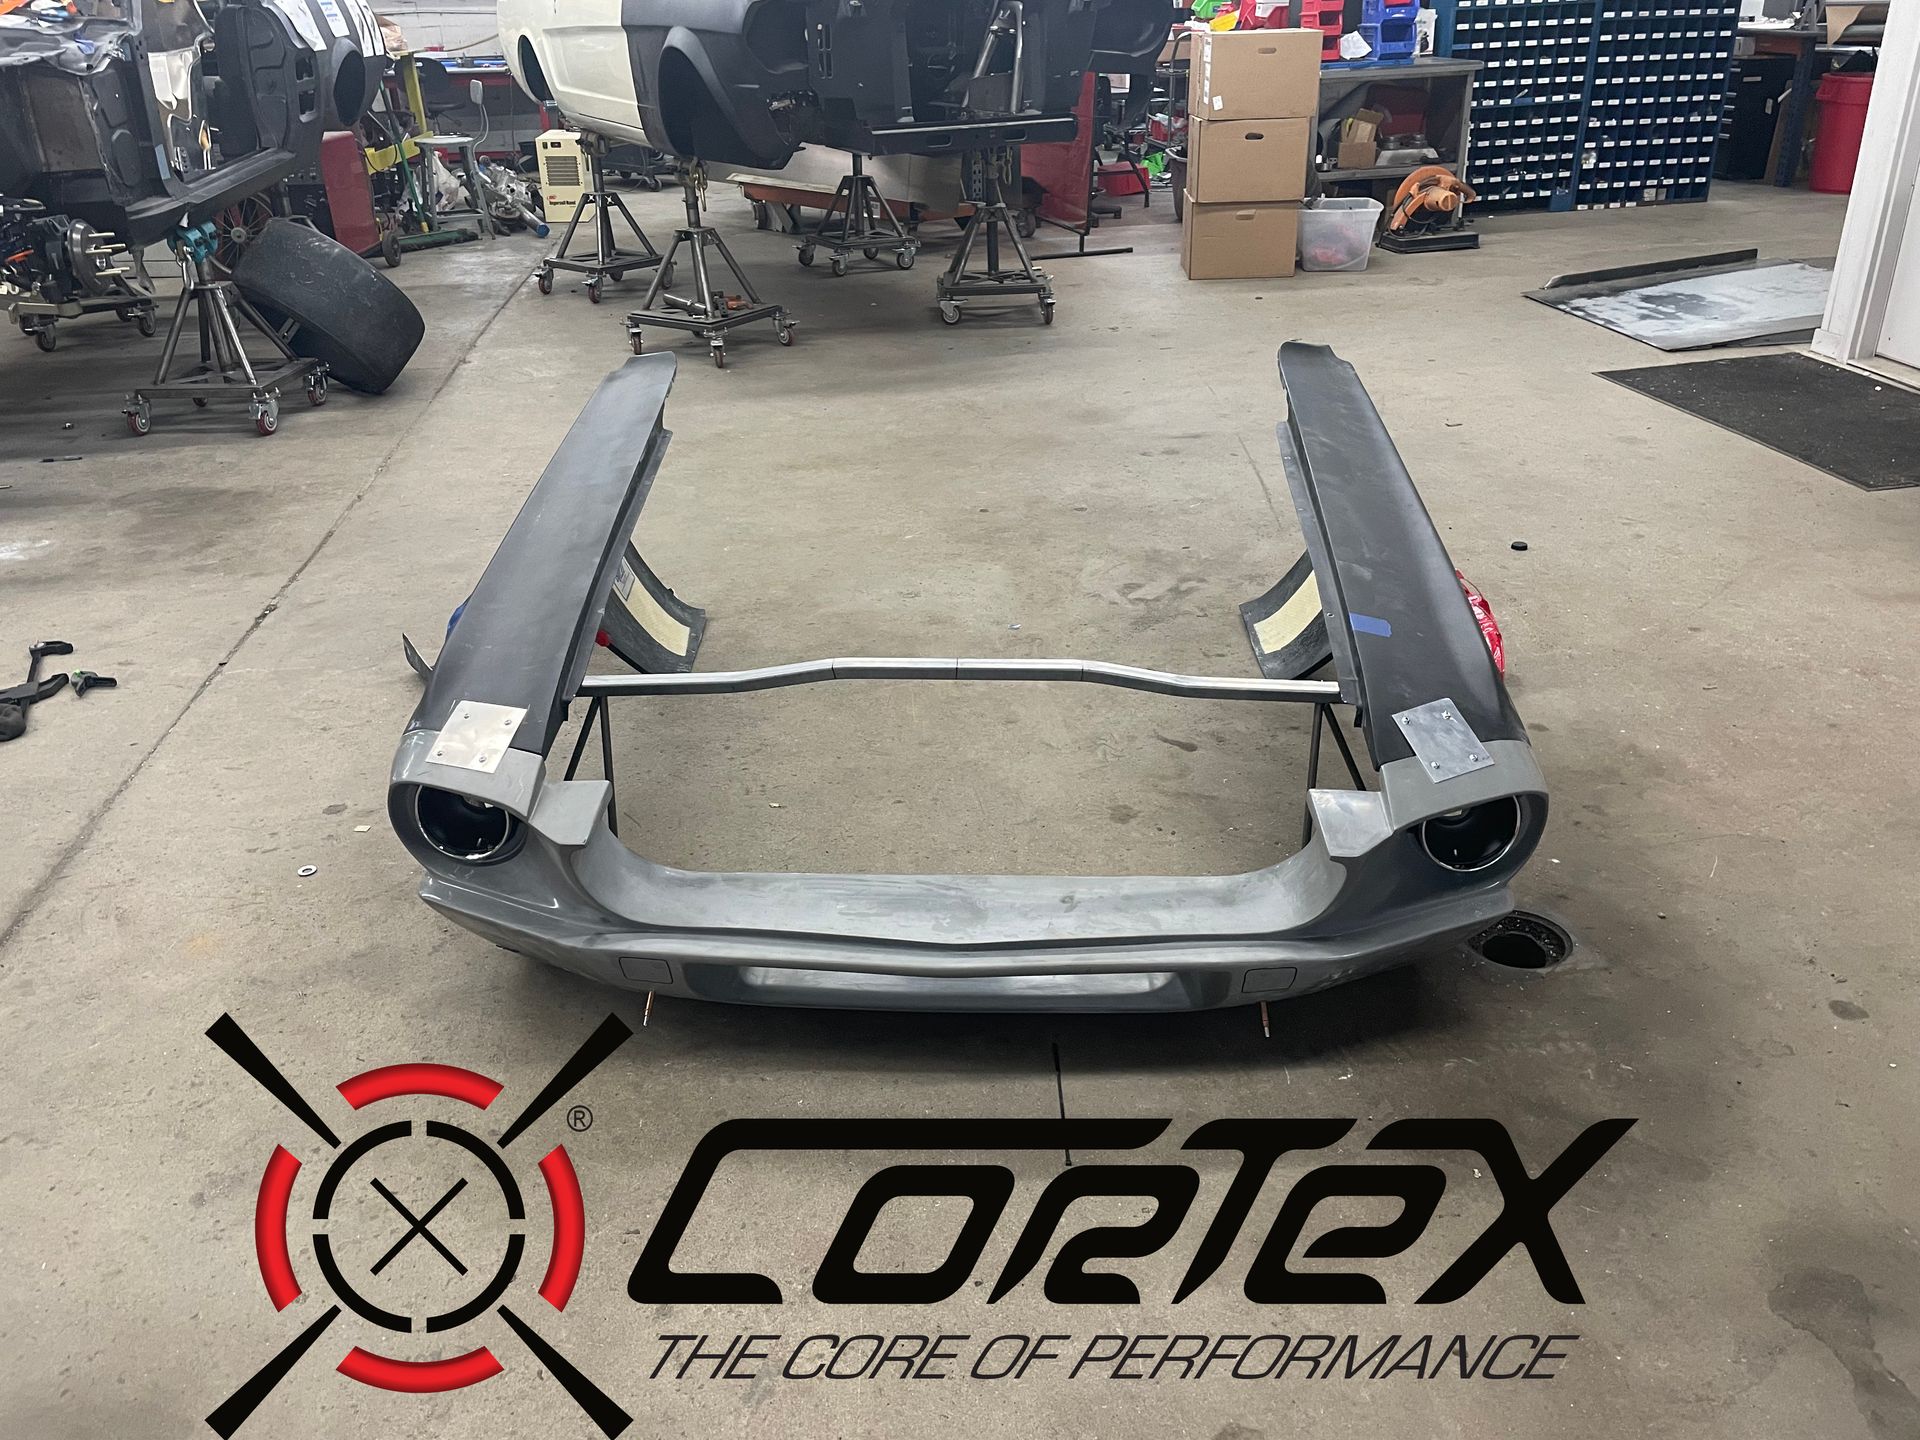
On that note, let's talk about the front. The customer wanted to easily be able to remove the front nose & fenders to gain access to critical components. In addition to this, we would need to custom make something to fit over the gorgeous Forgeline wheels we custom spec'd for the build. We frequently help customers order the perfect wheels for their vintage mustang and have a variety of advanced calculators to get the offset, backspacing, and wheel size just right. If you want a set of Forgelines or other custom wheels for your restomod, give us a call.

The front clamshell is a design in process. We're experimenting with different flares, 3D scanning as we go, and will likely turn this into a mold with which to make a carbon fiber finished part.


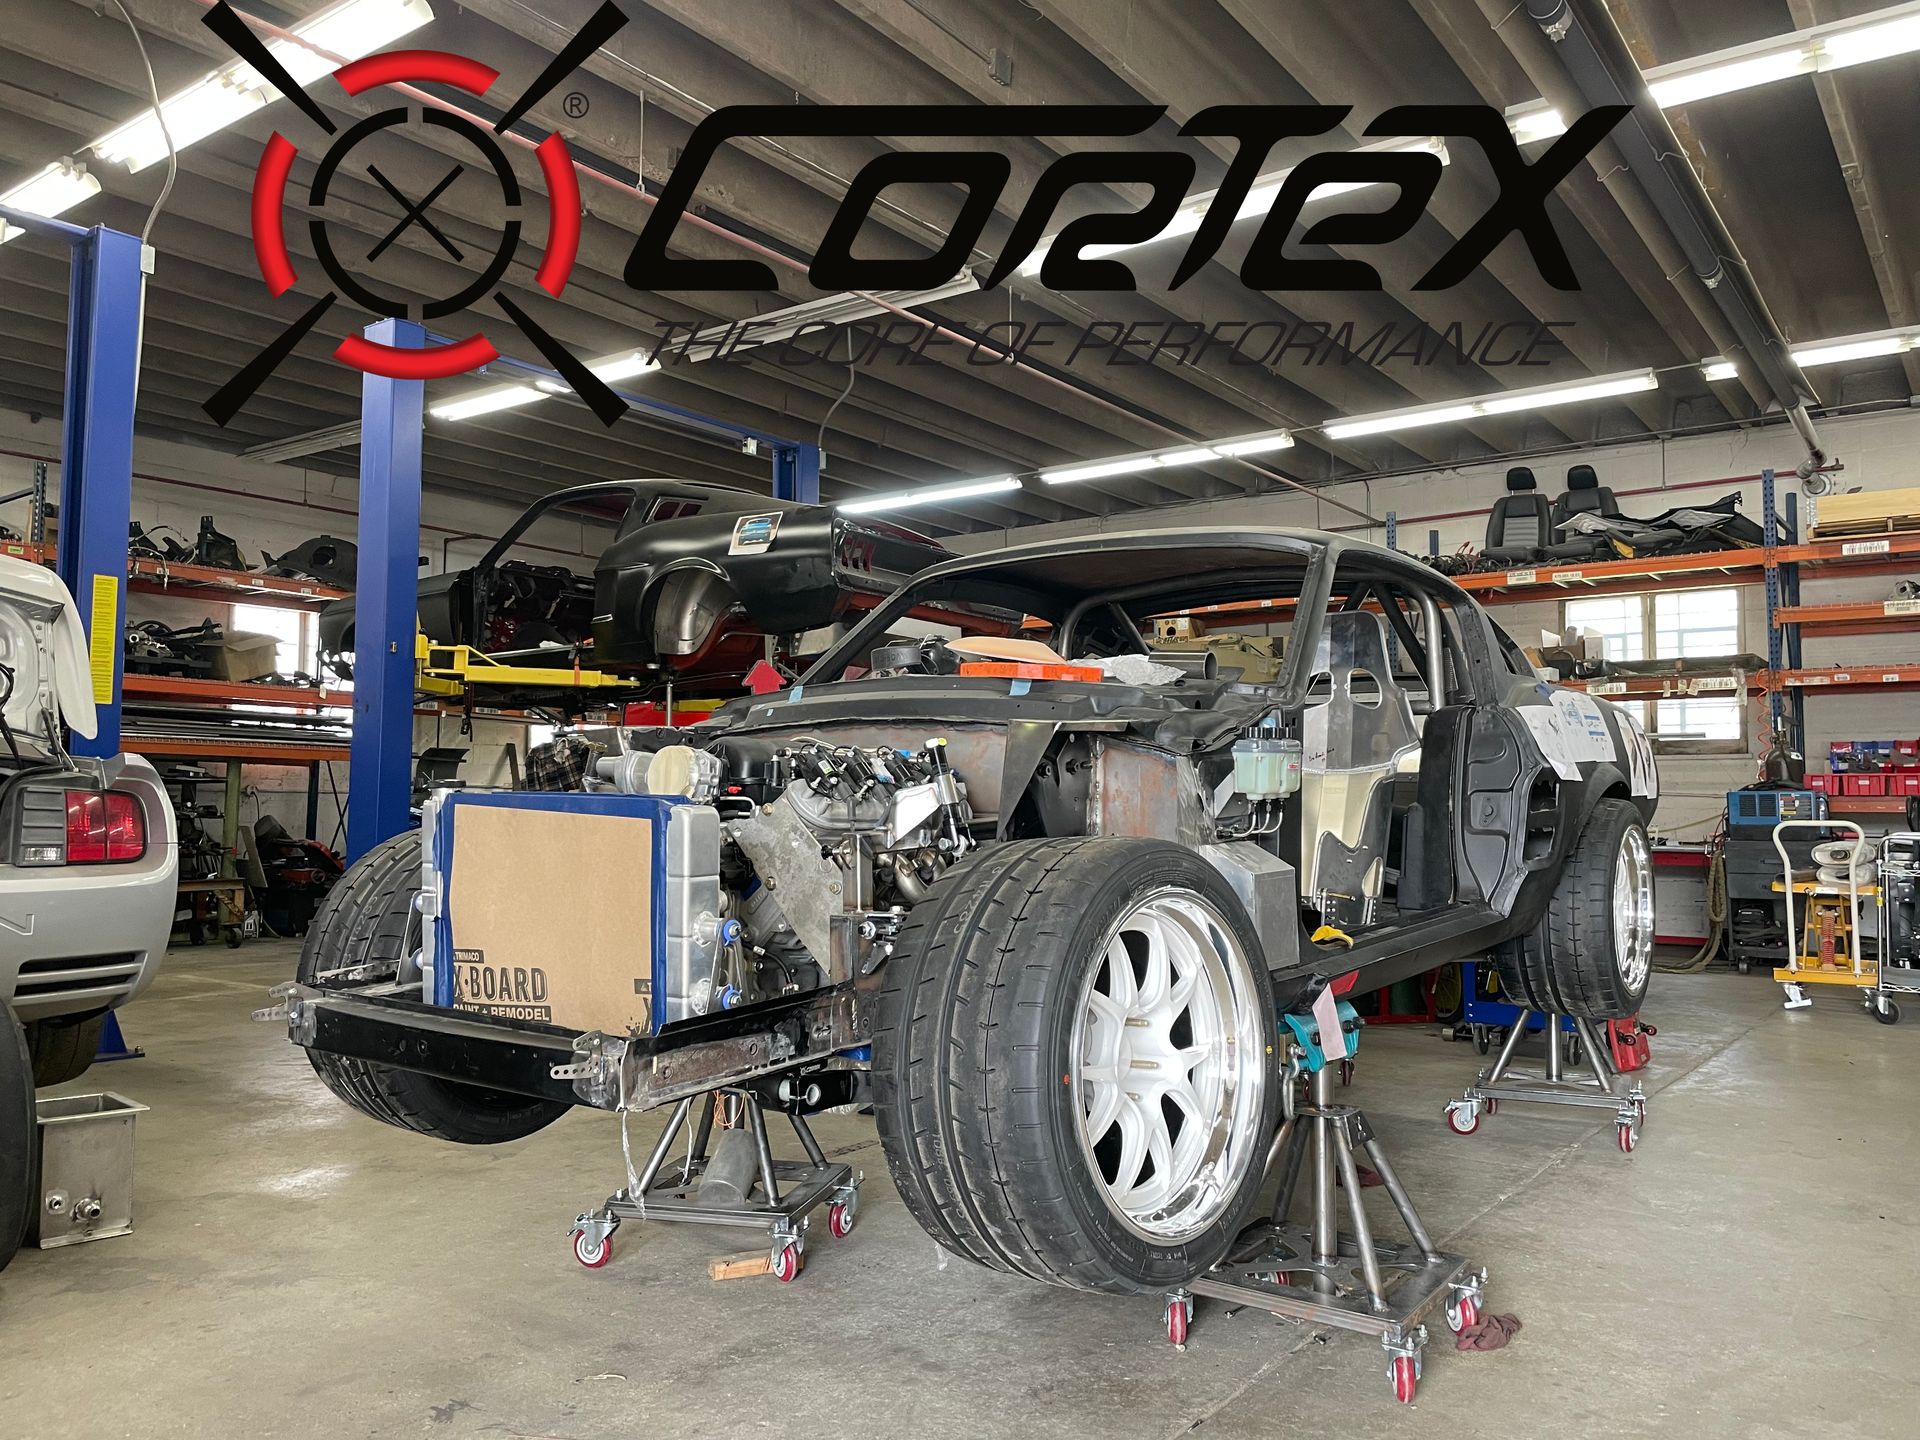
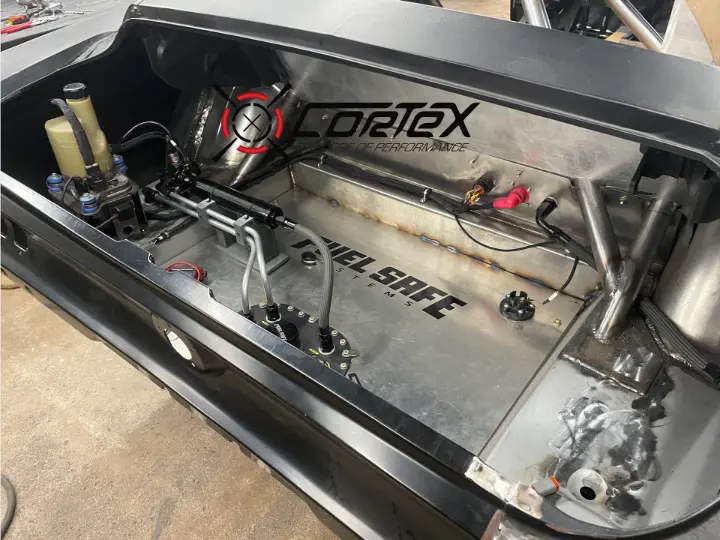
We're in love with the look of the car at this point and it's getting closer and closer to its first start up. To do that, we'll still have to plumb and wire the car which is where we close this chapter out. The team have currently installed the radiator responsible for cooling the engine into its resting place and have begun work on the fuel system.
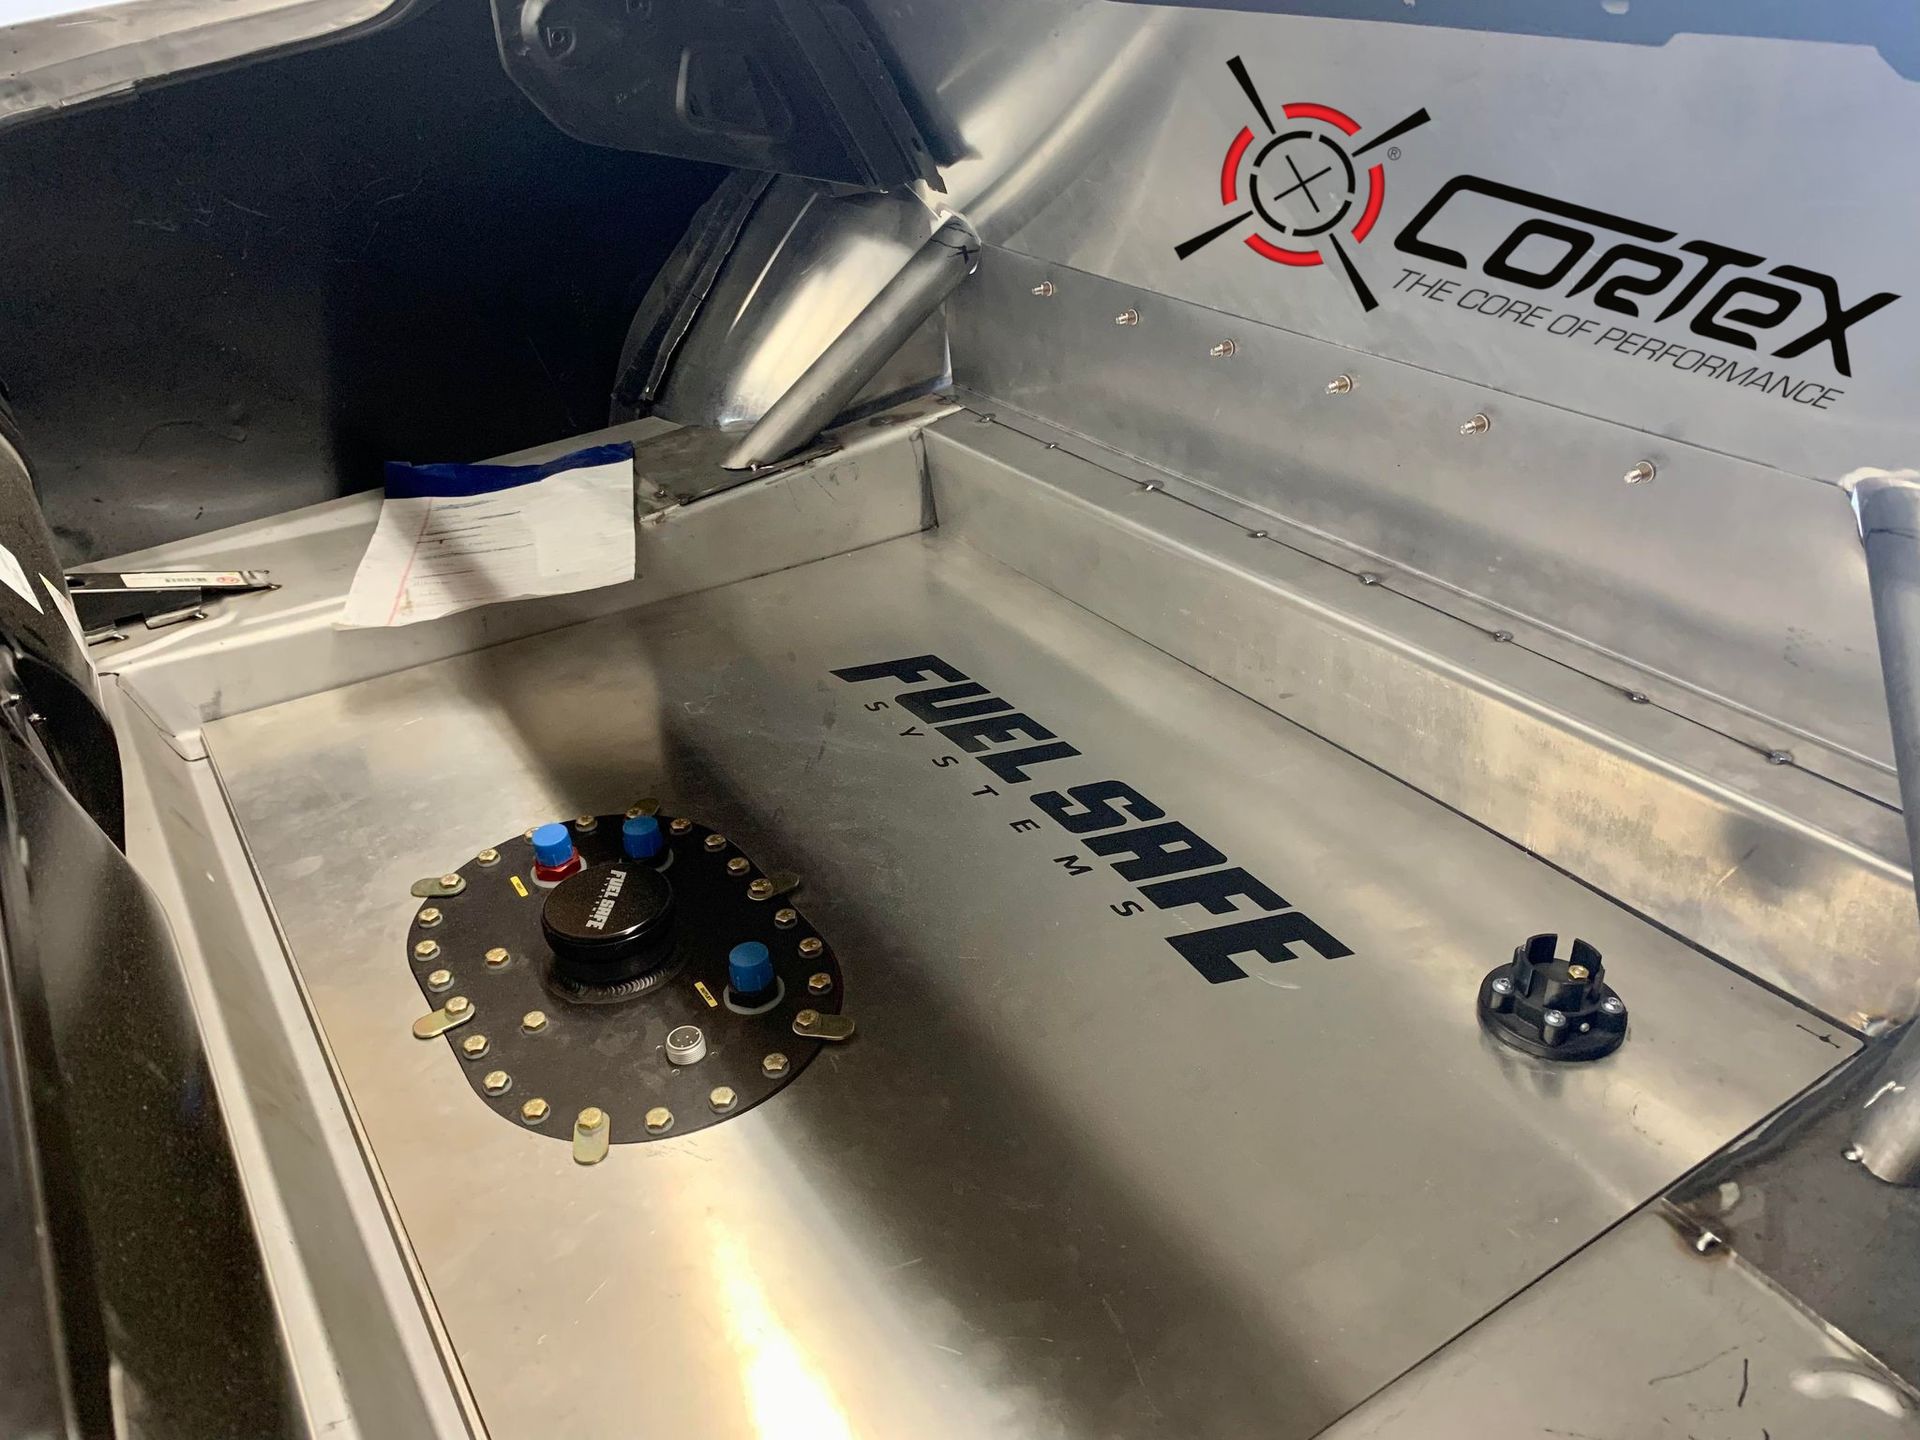
For this and so many of our other vehicle builds, we utilized one of our custom Fuelsafe vintage mustang kits. These kits come pre-wired with the pump already installed and includes the needed fittings and pigtails to wire up to your engine. If you need a fuel system for your vintage mustang, you can read more about our system here.
Part 3: It's Alive!
The work never stops, and boy there has been a LOT OF WORK to do to get this shell ready for its first fire up. In the previous release of this blog, we talked through a bunch of systems mounting but in this episode we are going to tie everything together and breath some life into the LS7.
First, let's cover some of the major updates. The structural spine is completed, and a new roll bar, along with door bars has been finalized. In addition to the roll bar, we have finished creating a containment system for the dry sump, mid mounted for proper weight distribution.
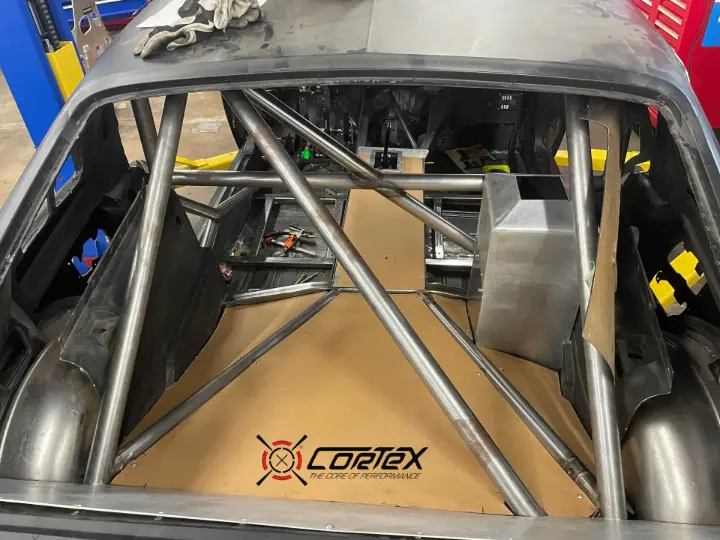
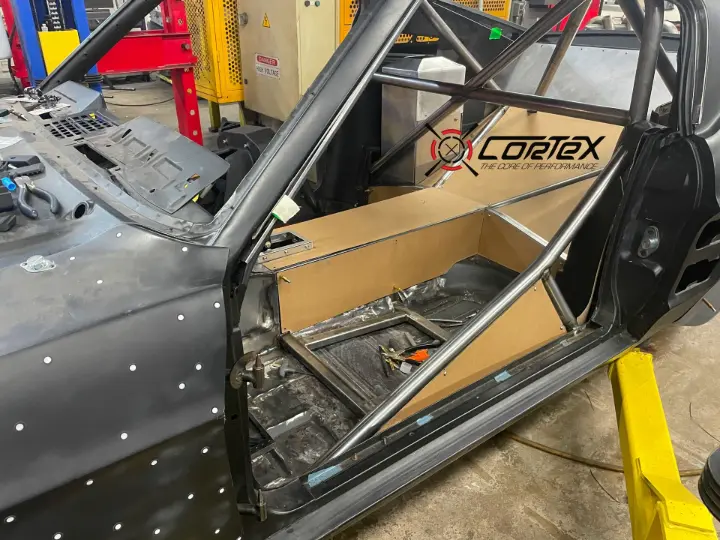
One of the really awesome little details is that all of the paneling in the interior is made of carbon fiber. Yeah, those cardboard looking sheets are actually gloss carbon, currently under their protective coverings until the build is totally complete. We think that this is going to look incredible when done.
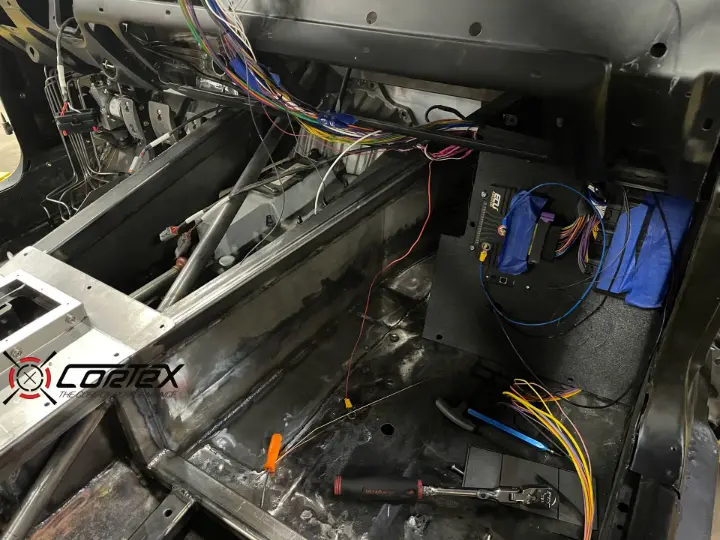
With most of the metal work now out of the way, the team set off on fully plumbing the car, including wiring, fuel delivery, oiling system, coolant, and hydraulic steering. We started with a super trick remote electric power steering pump, relocated to the trunk to again try to optimize weight distribution. Also pictured are wiring layouts. We've found that over the years, a bundle string with the specific wire functions labeled on the end in painters tape offers an easy way to effectively mock-up wire routing & lengths.

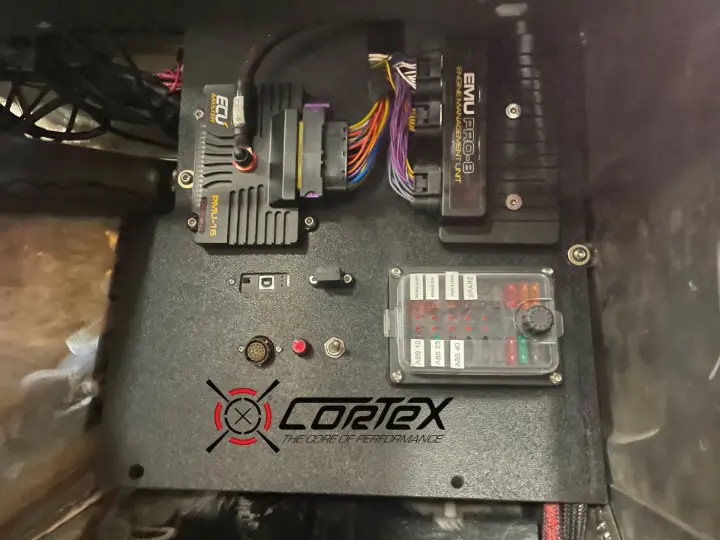
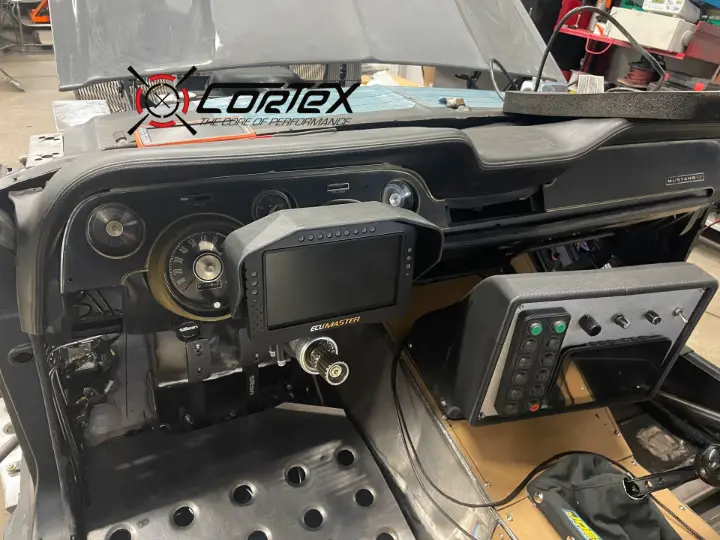
This build is going to feature a full ECU Master electronics suite including their digital dash, power distribution module, ECU, and CAN key pad. We mounted the PDM, ECU, fuse bank, and data connection point all onto a single bracket which will be covered up and mounted up in the passenger footwell.
This design turned out to be incredibly clean, despite the amount of wiring hidden within the car, covering various functions like traction control, ABS, chase-cameras, and more. As a point of mention, all of these pieces will need to come back out of the car for paint so what you see here isn't the final product, just how everything will sit.
Below, you can see how the engine harness wiring looks in the "roughed in" stage, along with the fuel lines & brake lines. This car will feature a fully removable front clamshell where the fenders are integrated into the bumper. We used a trick quick-release mounting system tied into the chassis to facilitate easy installation. The radiator was also mounted and plumbed in during this step.
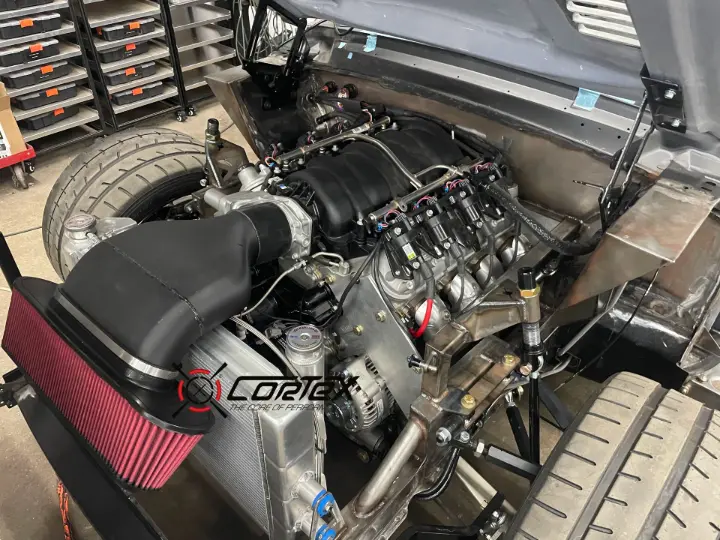
Another custom piece was the 3D printed intake, designed to drop over the radiator trans-am racing style. This will eventually mate up to a fully boxed radiator setup which we will tackle later in the project.
Turning attention to the interior, the team mounted up the original factory dash, along with a new steering column and the ECU master display. We also 3D printed a canted center console which holds the CAN keypad, ABS adjuster, rear chase camera screen, and a few other aux switches. The net result we think speaks for itself.
You will also note some Kirkey race seats supplied by the customer, completed floor risers, original doors with carbon fiber inserts, and totally custom lexan roll-up windows. Yep, you read that right. Lexan roll-up windows.
Without further ado, click the video below to listen to Hatemail alive and purring. We are still on a base tune so nothing too violent.
What's next? While she may look a bit raw, the car is fully mobile and can drive without issue. We need to get the tune dialed in so the car will make a short trip via trailer down to the local dyno shop for some tune time. Once we get the tune dialed and the car running perfectly, it will come back here for its final phase of the project. For this particular car, the customer is electing to do the body work. So, we will be completely disassembling the car back down to its shell, prepping and painting the chassis, then completing a final assembly prior to the customer picking it up.
Look out for a part 4 in the not too distant future detailing out the dyno trip, disassembly, paint, and final assembly.
Build Summary: CorteX Racing Components Used
-
CorteX SLA Front Suspension System (Double A-Arm with billet spindle)
Designed for vintage Mustangs to replace the weak front geometry with a race-car grade double-A arm setup, modern steering, and upgraded spindle/hub.
-
CorteX Xtreme-Grip Rear Suspension System with 8.8" Cambered Axle (Watts Link & Torque Arm Setup + Cambered Axle)
A full rear suspension upgrade including the watts link, torque arm, and in this case a cambered 8.8″ axle with CV bearing drive. -
CorteX Vintage Mustang FuelSAFE Pre-wired Fuel System Kit
Used in the build for fuel delivery, these units eliminate the hassle of wiring your tank and ensure safe, motorsports grade operation. -
CorteX Tilton Pedal-Box Mount (Adjustable) for Vintage Mustangs
If you’re looking for an adjustable Tilton pedal box for your Vintage Mustang or race car build, this is the one to have. - Brembo PISTA Brake Kit The best in braking performance short of a full-fledged endurance / road racing setup.